
18 Halloween Bar Cart and Kitchen Styling Ideas for a Cozy Seasonal Setup
Halloween decorating does not have to take over your entire house. Sometimes a thoughtfully styled bar cart, a small kitchen counter, or a simple drink station is enough to bring the season indoors. A few dark bottles, black cocktail napkins, miniature pumpkins, and warm lighting can turn an ordinary corner into a Halloween display that feels festive without looking crowded.
The appeal of Halloween bar cart decor ideas is their flexibility. You can create a dramatic setup for an evening gathering, keep a subtle seasonal arrangement in your kitchen throughout October, or prepare a family-friendly drink station without buying specialized furniture.
You also do not need an elaborate collection of Halloween decorations. Everyday trays, glasses, jars, bowls, and kitchen accessories can provide most of the foundation. Seasonal elements simply add color, texture, and atmosphere.
These 18 Halloween bar cart and kitchen styling ideas focus on approachable details, useful arrangements, and realistic spaces. Whether you have a rolling cart, a narrow shelf, or a little unused countertop space, there is a way to create a stylish seasonal vignette that is easy to assemble and put away.
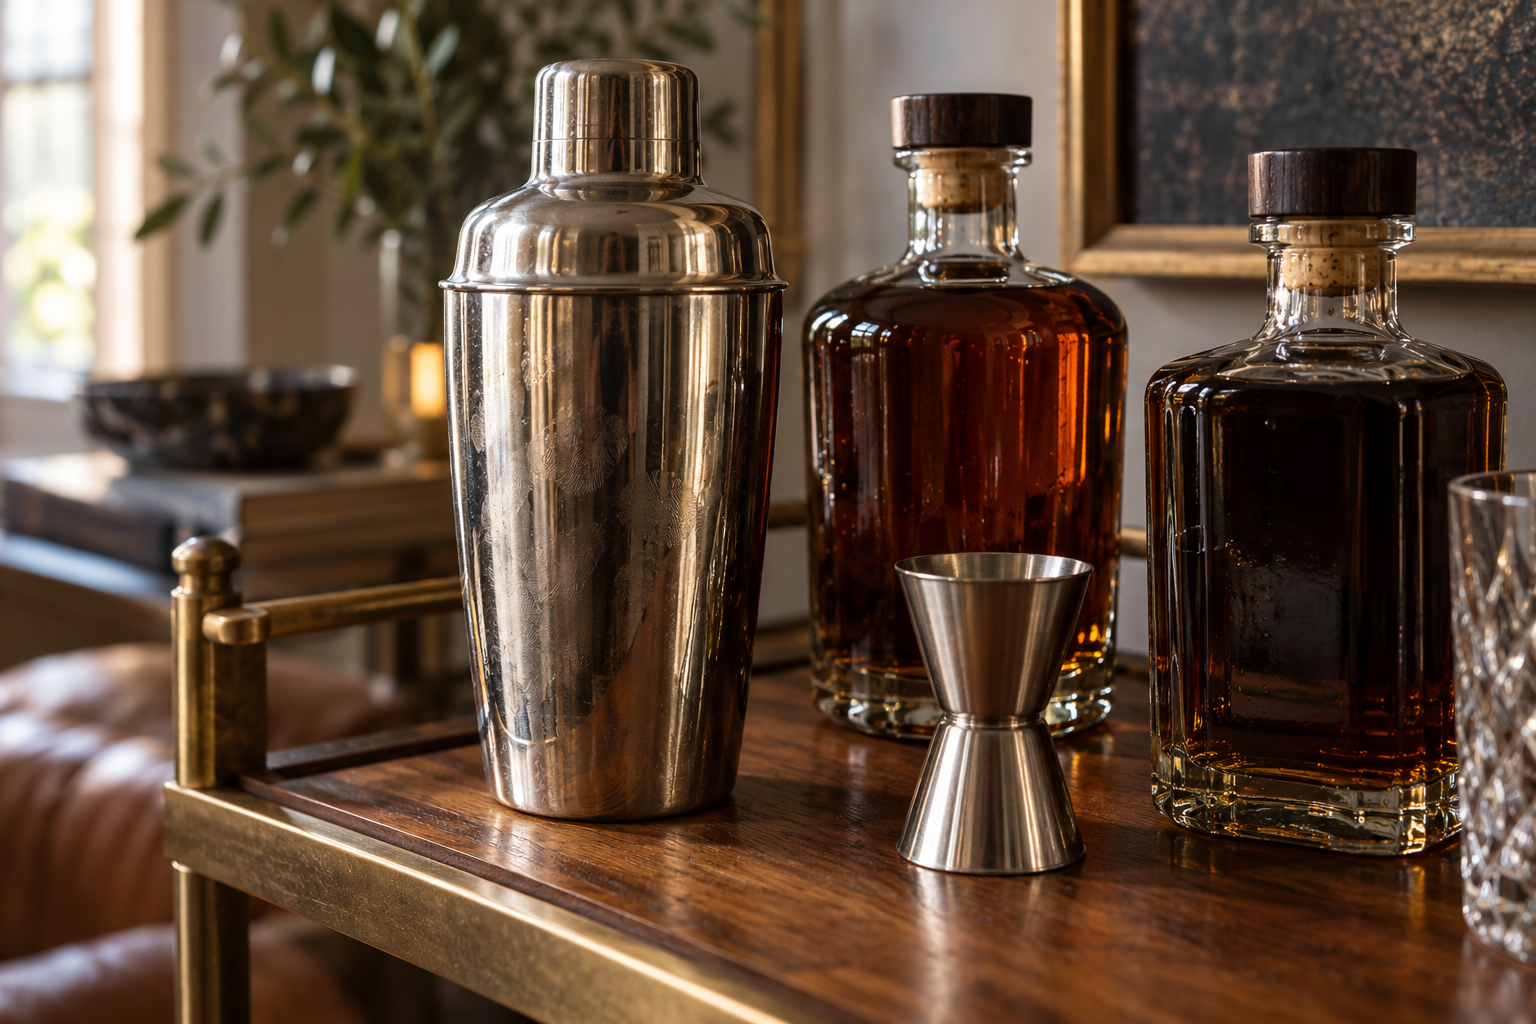
How to Plan a Halloween Bar Cart Without Making It Look Cluttered
Before choosing decorations, decide what the space needs to do. A drink station for guests requires more accessible surface area than a decorative corner that will mostly remain untouched.
Start with three visual elements: a foundation, a focal point, and a finishing detail. Your foundation could be a wooden tray or a bar cart shelf. The focal point might be a small pumpkin, a collection of dark glass bottles, or a seasonal arrangement of dried branches. Finishing details include folded napkins, ribbon, or a small battery-operated candle.
Keep the color scheme limited. Black, cream, amber, and muted orange work beautifully together. If your kitchen already contains warm wood, brass, or natural stone, allow those materials to remain visible instead of covering every surface.
Most importantly, leave room for the actual activity. Guests should be able to reach glasses, pour drinks, and pick up snacks without moving decorations around.
18 Halloween Bar Cart and Kitchen Styling Ideas
1. Create a Moody Bar Cart With Dark Glass Bottles
Dark glass bottles immediately establish a sophisticated Halloween atmosphere. Amber, olive-green, and smoky-gray glass create an understated seasonal look, especially when displayed against a light wall or natural wood background.
Place two or three bottles of different heights toward the back of the upper shelf. Add a small matte black bowl or pumpkin nearby to introduce another shape without overwhelming the arrangement.
The bottles do not need to contain anything special. Clean, reusable bottles filled with water, juice, or decorative dried stems can create the same visual effect.
Styling tip: Keep the tallest bottle slightly off-center and arrange smaller items around it. This creates an attractive silhouette while leaving space for glasses or other functional essentials.
2. Use Black Cocktail Napkins for Instant Halloween Contrast
One of the easiest Halloween bar cart upgrades is replacing ordinary napkins with black ones. Against clear glasses, metallic accessories, and light-colored trays, black fabric or paper creates an immediate seasonal contrast.
Fold several napkins neatly and place them in a low ceramic dish, small basket, or shallow wooden tray. A simple arrangement usually looks more intentional than a large stack surrounded by unrelated decorations.
For a softer appearance, combine black napkins with oatmeal-colored linen or cream-colored dishes. The contrast feels seasonal without requiring obvious Halloween graphics.
Styling tip: Repeat the black color in one other item, such as a small tray or dark bottle, to make the display feel coordinated.
3. Add One Small Pumpkin as Your Seasonal Focal Point
A miniature pumpkin is an inexpensive way to establish the Halloween theme without adding excessive decorations. White, pale orange, muted green, and traditional orange pumpkins can all work depending on your existing kitchen palette.
Choose one pumpkin that fits comfortably beside your glasses or bottles. Position it on a coaster, shallow plate, or wooden riser to keep the surface tidy.
Natural pumpkins provide subtle imperfections and texture that pair especially well with dark glass, wooden trays, and linen accessories.
If the cart is narrow, avoid stacking multiple pumpkins. One well-positioned pumpkin can communicate the season more effectively than several crowded together.
4. Style a Cocktail Shaker With Vintage-Inspired Accessories
A stainless steel cocktail shaker can become a practical centerpiece in a Halloween drink station. Its reflective surface contrasts nicely with matte black napkins, amber bottles, and natural wood.
Position the shaker near the center of the cart and arrange a jigger, stirring spoon, or clean glass beside it. Keep these pieces grouped together so the arrangement reads as a functional drink preparation area.
For a vintage-inspired appearance, introduce a small brass-toned accessory or an aged wooden tray. There is no need to purchase an entire matching barware set.
Styling tip: Keep decorative objects behind the shaker rather than directly in front of it. This keeps the tools accessible when someone actually prepares a drink.

5. Turn a Kitchen Counter Into a Mini Halloween Drink Station
You do not need a dedicated bar cart to create an attractive Halloween display. A small section of kitchen counter can provide the same seasonal effect while using furniture you already have.
Choose a spot away from the stove, sink splashes, and main food preparation area. Place a medium-sized tray on the counter and use it to contain your arrangement.
Add two glasses, a carafe of water or juice, a miniature pumpkin, and a folded dark napkin. Finish with a small vase of dried herbs or branches.
The tray creates a clear boundary between your seasonal display and everyday kitchen essentials, helping the counter remain useful.
When Halloween is over, remove the seasonal pieces and return the tray to its regular purpose.
6. Decorate With Dried Herbs and Autumn Branches
Dried foliage introduces natural movement and texture to Halloween kitchen decor. Rosemary, lavender, wheat stems, and small dried branches can soften the appearance of dark bottles and black accessories.
Use a narrow ceramic vase or recycled glass bottle to hold a modest arrangement. Trim the stems so they do not interfere with open shelving or extend into busy walkways.
Dried herbs also complement wood cutting boards, woven baskets, and warm neutral kitchens. Their muted colors create a subtle connection to autumn without relying on bright orange decorations.
Styling tip: Position dried branches away from candles, burners, and other heat sources. Battery-operated lighting is a practical alternative when dried materials are nearby.
7. Build a Black-and-Cream Halloween Bar Cart
For a clean, modern Halloween aesthetic, limit the arrangement to black and cream. This color combination feels calm and coordinated while remaining recognizable as seasonal styling.
Start with a cream-colored ceramic tray or bowl. Add black napkins, dark glass, and a small pale pumpkin. Clear glasses provide visual breathing room between the darker objects.
If your cart has two shelves, use the upper shelf for the main display and the lower shelf for practical items such as extra napkins, cups, and serving accessories.
Resist the temptation to add every black-and-white Halloween decoration you own. Keeping a small number of objects allows their shapes and textures to stand out.
8. Create an Amber Glass and Warm Light Display
Amber glass is particularly effective for a cozy Halloween drink station. It reflects warm light and pairs naturally with cream walls, wood furniture, and muted autumn colors.
Gather amber bottles or drinking glasses in two or three different sizes. Arrange them beside a small pumpkin and a folded cloth napkin on a wooden tray.
Add a battery-operated candle or a nearby lamp for soft evening illumination. Position the light so it catches the edges of the glass rather than shining directly into guests’ eyes.
This setup works especially well in a kitchen corner, dining nook, or living room where strong overhead lighting would otherwise make the arrangement feel flat.
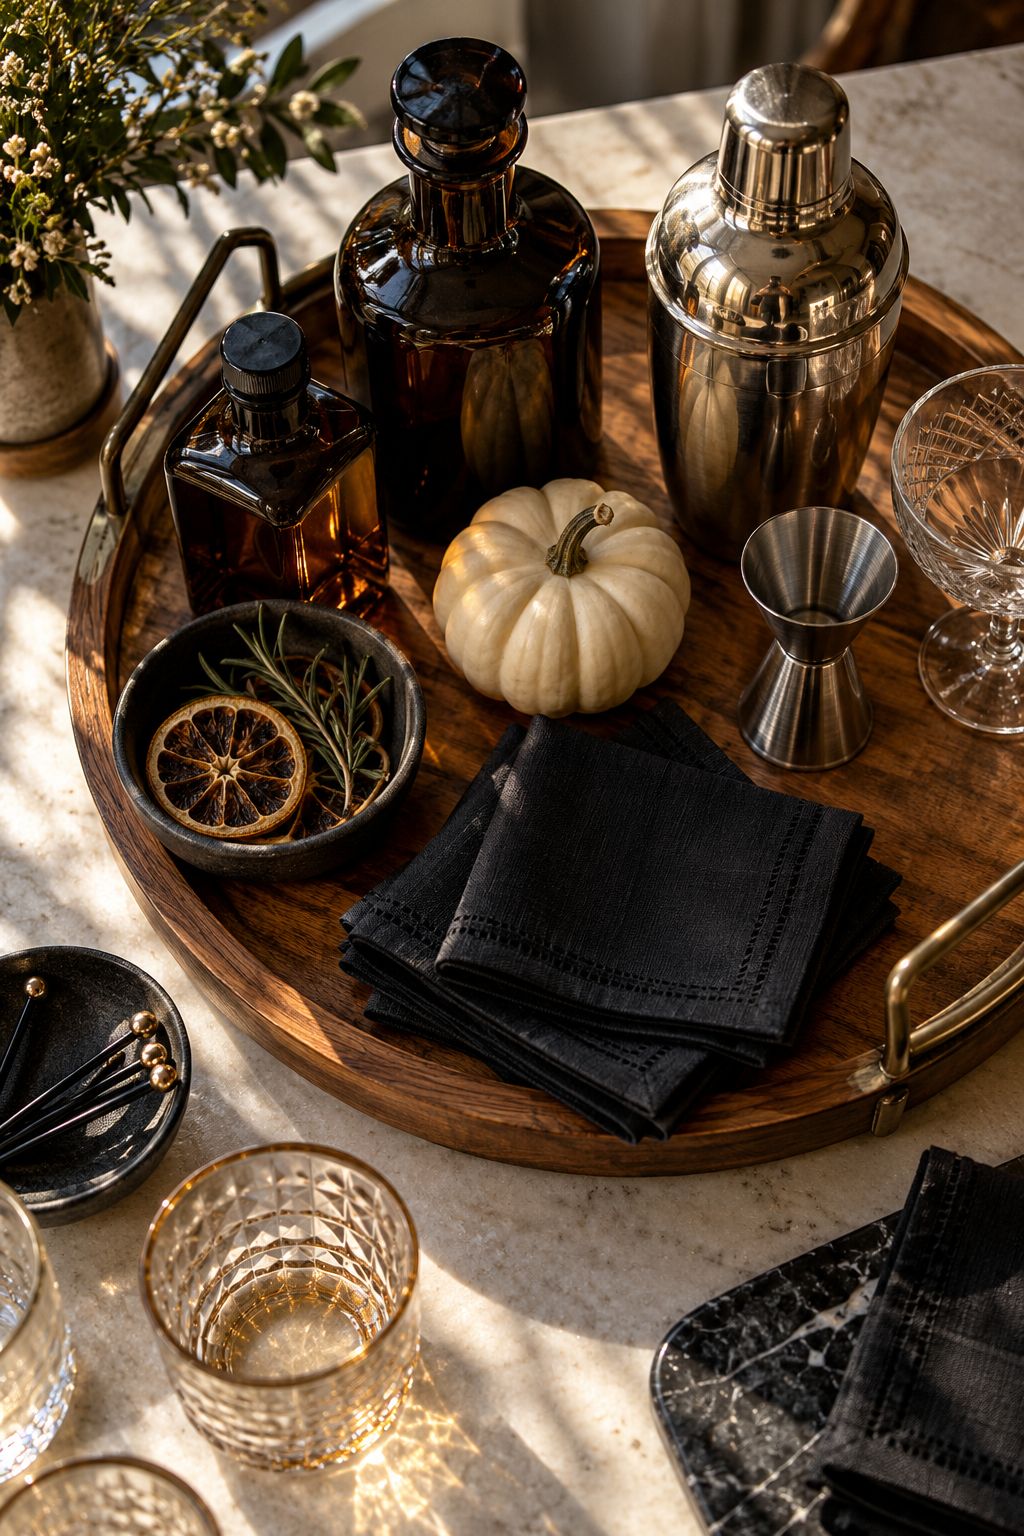
9. Organize Halloween Drink Supplies on a Decorative Tray
A tray is one of the most useful accessories for a compact seasonal display. It provides structure, keeps small items together, and makes the arrangement easy to move when additional counter space is needed.
Choose a rectangular wooden tray, a round metal tray, or a shallow ceramic platter. The material should coordinate with your existing furniture rather than introducing a completely different style.
Place taller bottles at the back, drinking glasses near the front, and decorative accents in the remaining corners.
Leave enough empty space so the tray can be lifted safely without pieces falling over.
Styling tip: If the display feels disorganized, remove one or two objects before buying another accessory. A simpler arrangement often improves the overall composition.
10. Style a Small Halloween Coffee and Cocoa Station
A seasonal drink station does not have to revolve around cocktails. Coffee, tea, hot chocolate, and apple cider can all become part of a welcoming Halloween kitchen arrangement.
Place your mugs on a shallow tray with a small jar of cocoa powder, tea bags, or wrapped drink stirrers. Add a miniature pumpkin and a dark cloth napkin to establish the seasonal theme.
For a family-friendly gathering, provide separate containers for marshmallows and other toppings. Choose containers that are easy for guests to handle without disturbing the decorative arrangement.
Keep electric kettles and coffee machines on stable, heat-resistant surfaces with their required operating clearance. Avoid placing fabric, paper decorations, or dried foliage near hot appliances.
This idea is especially practical for smaller households because the station can remain useful long after Halloween.
11. Add a Small Halloween Snack Bowl to the Cart
Small snacks can make a decorative bar cart feel more inviting and functional. A matte ceramic bowl containing wrapped treats, crackers, or individually packaged snacks adds a useful element without requiring an entire buffet.
Choose a bowl that leaves adequate room for drinks and serving accessories. A low dish generally works better on a narrow shelf than a tall container that blocks other items.
Use a separate small serving tray for unpackaged food. Keep edible items away from decorative botanicals, glitter, painted decorations, and anything not intended for food contact.
Styling tip: Match the bowl to the existing color palette. A cream ceramic dish can soften dark accessories, while a black bowl can add contrast to a wooden cart.
12. Use a Tiered Stand for a Compact Halloween Display
A small tiered stand creates vertical organization when countertop space is limited. It can hold napkins, miniature pumpkins, sealed snacks, or lightweight seasonal accessories.
Place the heaviest items on the bottom tier and reserve the upper tier for smaller, lighter pieces. Avoid building a tall or unstable display on a narrow rolling cart.
For kitchen counters, a two-tier stand can create a seasonal centerpiece without spreading decorations across the entire work surface.
If you already own a tiered fruit stand or serving display, reuse it instead of purchasing a Halloween-specific version.
The goal is to create a tidy arrangement that remains accessible and stable throughout everyday use.

13. Combine Black Napkins With a Small Battery-Operated Candle
Black cocktail napkins and a small candle-style light create a simple but atmospheric Halloween vignette. The contrast between dark fabric and a warm glow works beautifully on a wooden or metal bar cart.
Arrange neatly folded napkins on one side of a shallow tray. Place a battery-operated candle on the opposite side and add a small glass or pumpkin between them.
Choose a warm white light rather than a brightly colored flashing effect if you want a more refined appearance.
Battery-operated candles are particularly useful near napkins and dried seasonal materials because they avoid an exposed flame.
Styling tip: Let the candle-style light provide a soft accent instead of making it the brightest object in the room.
14. Create a Simple Black Cat and Pumpkin Corner
A small black cat figurine introduces a recognizable Halloween motif without requiring an elaborate theme. Pair it with one miniature pumpkin for a playful but restrained seasonal arrangement.
Position the figurine toward the back of a tray or shelf and place the pumpkin slightly forward. Add a low bowl or a small glass nearby to connect the decorative items with the function of the space.
Choose matte ceramic, wood, or another finish that coordinates with your existing accessories.
For a minimalist kitchen, keep the figurine small enough that it feels like a detail rather than the main visual feature.
This arrangement is easy to store because it requires only a couple of seasonal decorations.
15. Use Dark Ribbon to Coordinate Everyday Glassware
Ribbon is an inexpensive way to connect ordinary drinkware and kitchen accessories with your Halloween color scheme.
Wrap a short length of black or dark taupe ribbon around the neck of a decorative bottle or the handle of a display basket. Tie it securely in a simple knot or bow.
Avoid attaching ribbon to drinking rims, frequently handled glassware, or parts of containers that contact food and beverages.
Choose cotton or linen ribbon for a softer natural texture. Satin ribbon can work in a more formal editorial arrangement but may look out of place in a rustic kitchen.
Styling tip: Repeat the ribbon color only once or twice. Too many bows can make a small display feel busy.
16. Style a Kitchen Shelf With Halloween Serving Pieces
Open kitchen shelving provides another opportunity for seasonal styling without sacrificing valuable counter space.
Choose a section that already holds mugs, glasses, or small serving bowls. Replace one everyday decorative object with a miniature pumpkin, a dark ceramic vessel, or a small seasonal figurine.
Keep frequently used dishes within comfortable reach and avoid stacking unstable objects above food preparation areas.
For visual balance, group related objects together instead of scattering individual Halloween decorations across every shelf.
If the kitchen has several open shelves, decorate just one. A concentrated seasonal display usually feels more intentional and leaves the rest of the room visually calm.
17. Create a Cozy Halloween Bar Cart in a Living Room Corner
A bar cart can work as an attractive seasonal feature even when it is not positioned in the kitchen. A quiet living room corner offers a natural setting for a small Halloween display.
Place the cart near a wall with enough room to access the shelves and move around it comfortably. Use a table lamp or nearby wall lighting to create a warm atmosphere.
On the top shelf, arrange dark bottles, a shaker, a small pumpkin, and folded black napkins. On the lower shelf, place extra glasses, a basket, or a neatly stacked set of serving accessories.
Keep the surrounding floor clear. A cart with clean lines and a few carefully chosen objects can stand out without needing additional floor decorations.
For a cohesive room, repeat one of the display colors in an existing throw pillow, blanket, or nearby vase.
18. Build an Easy Halloween Bar Cart Using Items You Already Own
The most approachable Halloween styling idea is a display assembled from everyday household objects. You do not need matching seasonal drinkware, expensive decor, or a dedicated entertaining cart.
Start with any stable surface: a rolling utility cart, side table, counter tray, or small shelving unit.
Gather a few reusable pieces, such as a clean glass bottle, a ceramic bowl, neutral drinking glasses, a folded dark napkin, and a wooden cutting board. Add one seasonal accent, such as a miniature pumpkin or a simple paper bat attached to a nearby wall using a surface-appropriate removable method.
Arrange the largest object first. Add smaller pieces at different heights and leave part of the surface empty for practical use.
Step back and view the arrangement from the entrance to the room. If it looks crowded, remove something. If it looks disconnected, bring the objects closer together or place them on a tray.
This approach is especially useful for beginners because it lets you experiment with Halloween styling without committing to new purchases.

How to Style a Halloween Bar Cart Step by Step
Once you have selected a few ideas, use this simple setup method to bring everything together. The process works equally well for a bar cart, kitchen counter, or small side table.
- Clear the surface: Remove everyday clutter, wipe down the shelves or countertop, and check that the furniture is stable.
- Choose a color palette: Select two or three dominant colors, such as black, amber, and cream, to keep the arrangement cohesive.
- Position the tallest objects: Place bottles, a narrow vase, or another tall item near the back so shorter pieces remain visible.
- Add functional essentials: Arrange glasses, napkins, a shaker, and serving pieces within easy reach.
- Introduce one seasonal focal point: Add a miniature pumpkin, small black cat figurine, or another restrained Halloween accent.
- Use a tray for smaller accessories: Group loose items together to keep the display organized and easy to move.
- Finish with warm lighting: Use a nearby lamp or a battery-operated candle to create a soft, cozy appearance.
- Check the final arrangement: Make sure nothing blocks access, creates a tipping risk, or interferes with everyday kitchen activities.
You can also adapt the layout for different occasions. For a party, reserve more space for cups and beverages. For everyday seasonal styling, keep the arrangement simple enough that it does not require constant rearranging.
The Biggest Halloween Bar Cart Styling Mistake to Avoid
The most common visual problem with a small seasonal display is adding too many unrelated objects. Mini pumpkins, spiders, skeleton figurines, ribbons, garlands, candles, and themed containers may each look attractive individually, but placing all of them on one narrow shelf can make the display difficult to use and visually confusing.
Instead of decorating every inch, choose a clear focal point and build around it.
For example, start with three dark bottles. Add black napkins and a miniature pumpkin. Then stop and assess whether the display needs anything else.
A helpful approach is to leave visible space between groups of objects and vary the height of the items. Taller bottles provide structure, medium-sized serving pieces establish function, and small seasonal details add personality.
Pay attention to texture as well. Smooth glass, matte ceramic, woven fabric, and natural pumpkin skin can create interest even when the palette is limited.
A curated display should look attractive from a distance while remaining practical up close. Guests should never need to move a collection of decorations just to reach a clean glass.
Budget-Friendly Halloween Bar Cart Decorating Tips
Creating an attractive Halloween bar cart does not require a large decorating budget. Start by shopping your home before visiting a store.
Look for existing items in the kitchen, dining room, or living room that already fit your desired palette. Dark bottles, glass jars, serving trays, small bowls, and folded linens can all become part of the arrangement.
If you need a few additional details, prioritize versatile items that can be reused throughout the year.
- Small pumpkins: Use one or two as inexpensive seasonal accents rather than buying a large collection.
- Dark napkins: Choose reusable fabric napkins if they fit your household routine.
- Wooden trays: Reuse an existing tray to organize glasses, bottles, and small accessories.
- Glass containers: Clean jars and bottles can hold beverages, wrapped snacks, or decorative stems.
- Battery-operated lights: Reuse existing warm lights instead of purchasing themed lighting for a single holiday.
- Dried foliage: Use modest arrangements of suitable dried stems rather than elaborate artificial bouquets.
For a rough planning example, a display using a $4 miniature pumpkin, $5 napkins, and an $8 battery-operated candle would total approximately $17 before tax. These are illustrative budgeting amounts rather than verified store prices. If you already own the supplies, your additional cost can be much lower.
The most useful decorating purchases are often the pieces you can repurpose later. A plain tray, neutral ceramic bowl, or set of dark napkins can work for multiple seasons.
How to Make Halloween Kitchen Decor Feel Stylish Instead of Overdone
A Halloween kitchen display should complement the room rather than compete with its everyday function. The easiest way to achieve this is to match seasonal accessories to the materials and colors already present.
In a modern kitchen with white cabinets, use matte black accents and pale pumpkins. In a warm wood kitchen, combine amber glass, dark napkins, and natural dried stems. In a small apartment kitchen, keep everything within one compact tray to maintain usable counter space.
Lighting makes a difference. Soft directional light from a window can emphasize texture during the day, while a nearby warm lamp creates a welcoming atmosphere in the evening.
It also helps to maintain a consistent level of detail. If the rest of the kitchen is minimal, choose just a few Halloween accessories. If the room already contains layered textiles and vintage pieces, a slightly richer seasonal arrangement may feel more natural.
Think of the display as part of the kitchen rather than a separate themed installation.
How to Store Your Halloween Bar Cart Decorations After the Season
One advantage of decorating a small vignette is that cleanup can be straightforward. Because the display uses a limited number of items, most pieces can return to their regular household roles.
Remove perishable pumpkins and food items first. Clean serving accessories, dry glassware completely, and inspect decorative containers before storage.
Fold reusable napkins and place them in a clean, dry storage container. Wrap delicate figurines individually to prevent chips or scratches. Keep small seasonal accents together so they are easy to find the following year.
If you used a tray or a wooden board, return it to everyday kitchen use. Reusable bottles, glasses, bowls, and barware can remain part of your normal setup.
Label a small storage box for Halloween accessories rather than placing them loose among unrelated decorations. Keeping a compact collection organized makes future seasonal styling much easier.
Final Thoughts on Halloween Bar Cart and Kitchen Styling
The most effective Halloween bar cart decor ideas are not necessarily the most elaborate. A dark bottle arrangement, a simple pumpkin, warm lighting, and neatly folded napkins can create a seasonal display that looks thoughtful and inviting.
Focus on balancing decorative accents with useful items. Choose colors that complement your kitchen or living room, keep walkways and work surfaces clear, and allow the materials themselves to provide visual interest.
Whether you prefer a moody black-and-cream bar cart, an amber glass display, or a simple family-friendly cocoa station, these 18 ideas can help you create a small Halloween vignette that feels personal, practical, and easy to enjoy.
Start with what you already own, add one or two seasonal details, and let the finished arrangement feel naturally at home in your space.