
16 Halloween Window Decor Ideas for Renters That Look Festive Without Permanent Changes
Decorating an apartment for Halloween can feel complicated when you cannot drill holes, paint surfaces, or attach decorations permanently. Fortunately, a window is one of the easiest places to create a noticeable seasonal display without making major changes to your rental.
From black paper bats and playful ghost silhouettes to warm string lights and miniature pumpkins, there are plenty of Halloween window decor ideas that look beautiful from inside your home and catch attention from the sidewalk.
The secret is choosing decorations that are lightweight, easy to arrange, and appropriate for the surfaces in your apartment. Rather than covering every available inch of glass, you can create a more intentional Halloween scene using a few inexpensive materials and a simple color palette.
Whether you have one narrow apartment window, a large living room window, or several small panes, these 16 renter-friendly ideas will help you create a festive Halloween atmosphere without permanent alterations.
Most projects require basic craft supplies, and several can be made with items already sitting in a drawer. You can also combine two or three ideas for a more elaborate display while keeping the installation relatively simple.
What Makes Halloween Window Decor Renter-Friendly?
Before choosing your decorations, consider the type of window you have and the rules in your rental agreement. A technique suitable for ordinary untreated glass might not be recommended for specialty coatings, decorative films, or painted window frames.
Nonadhesive static-cling decorations, freestanding windowsill displays, and lightweight pieces supported by existing curtain hardware are useful options. Removable tape can sometimes work on glass, but it should be tested first and should not automatically be considered safe for every surface.
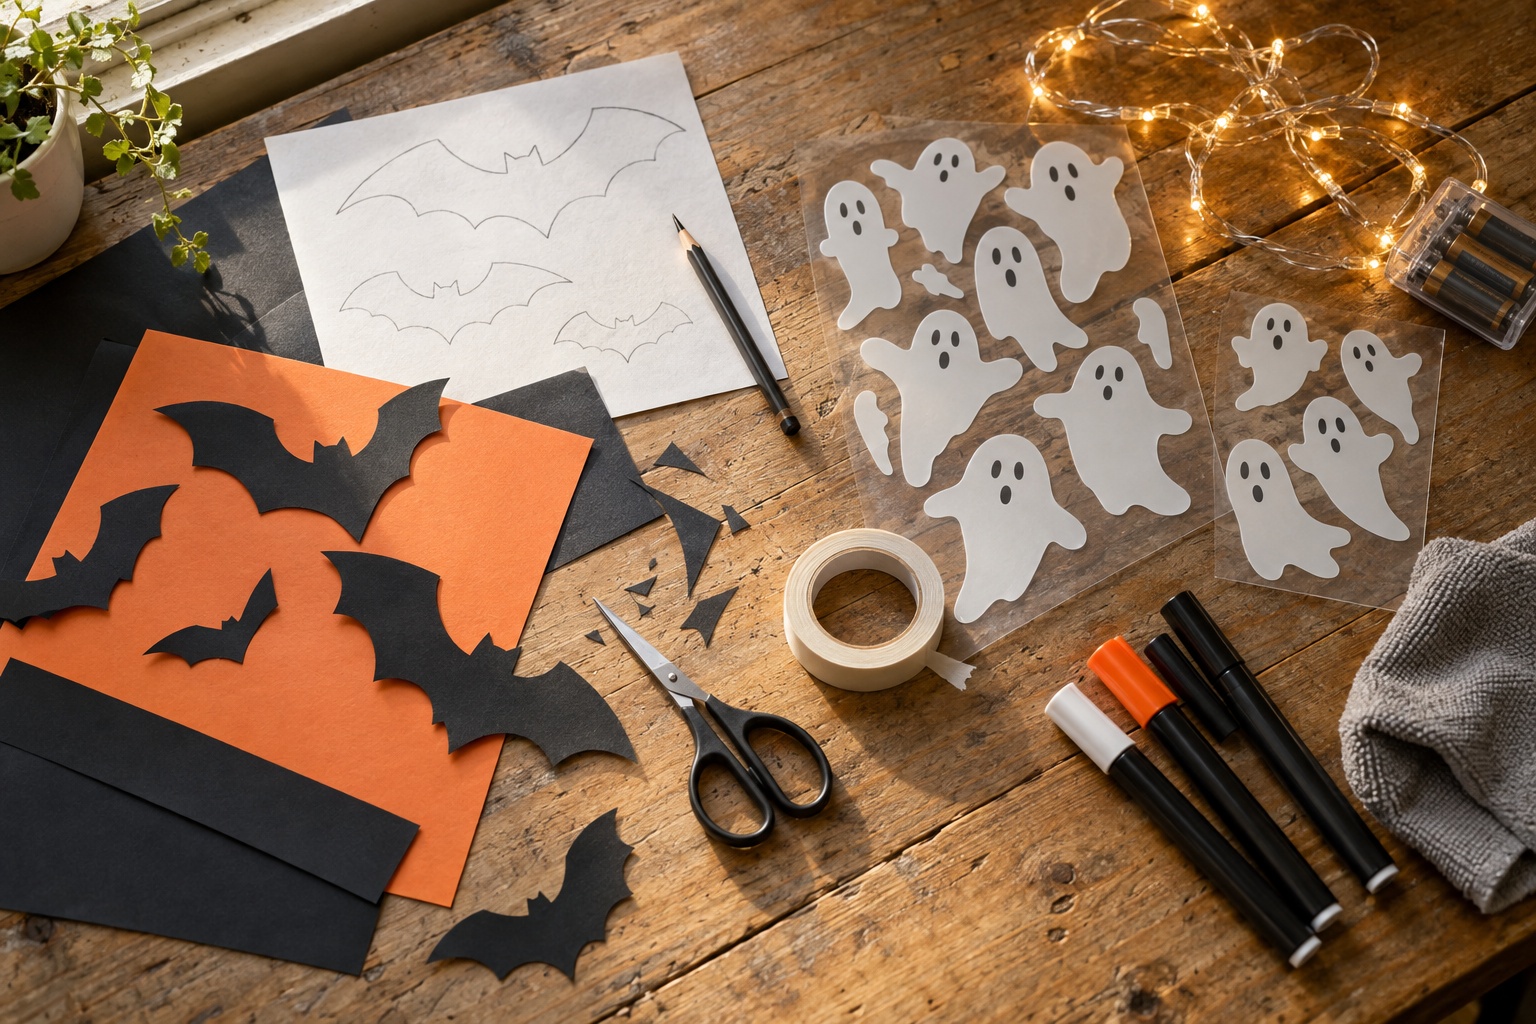
Materials worth keeping nearby include:
- Black, orange, and cream cardstock for lightweight silhouettes.
- Nonadhesive Halloween window clings compatible with your glass.
- Scissors, pencils, and printable or hand-drawn templates.
- Low-tack removable tape approved for the intended surface.
- Battery-operated LED fairy lights and flameless candles.
- Small pumpkins, decorative trays, and lightweight paper props.
- A microfiber cloth and a suitable glass-cleaning product.
A basic display using cardstock, a small set of clings, and inexpensive LED lighting might fit a planning budget of approximately $15 to $40, depending on what you already own. This is only a rough materials estimate, not a guaranteed retail price.
Important: Avoid drilling into frames, applying permanent adhesives, or attaching decorations to painted trim without permission. Keep windows that serve as emergency exits accessible. Never trap lighting cords in a closing window or place paper decorations against hot bulbs or heaters.
Easy Paper Silhouette Halloween Window Decor Ideas
Paper silhouettes are especially effective because their dark outlines stand out against illuminated windows at night. They are affordable, customizable, and easy to scale for different window sizes.
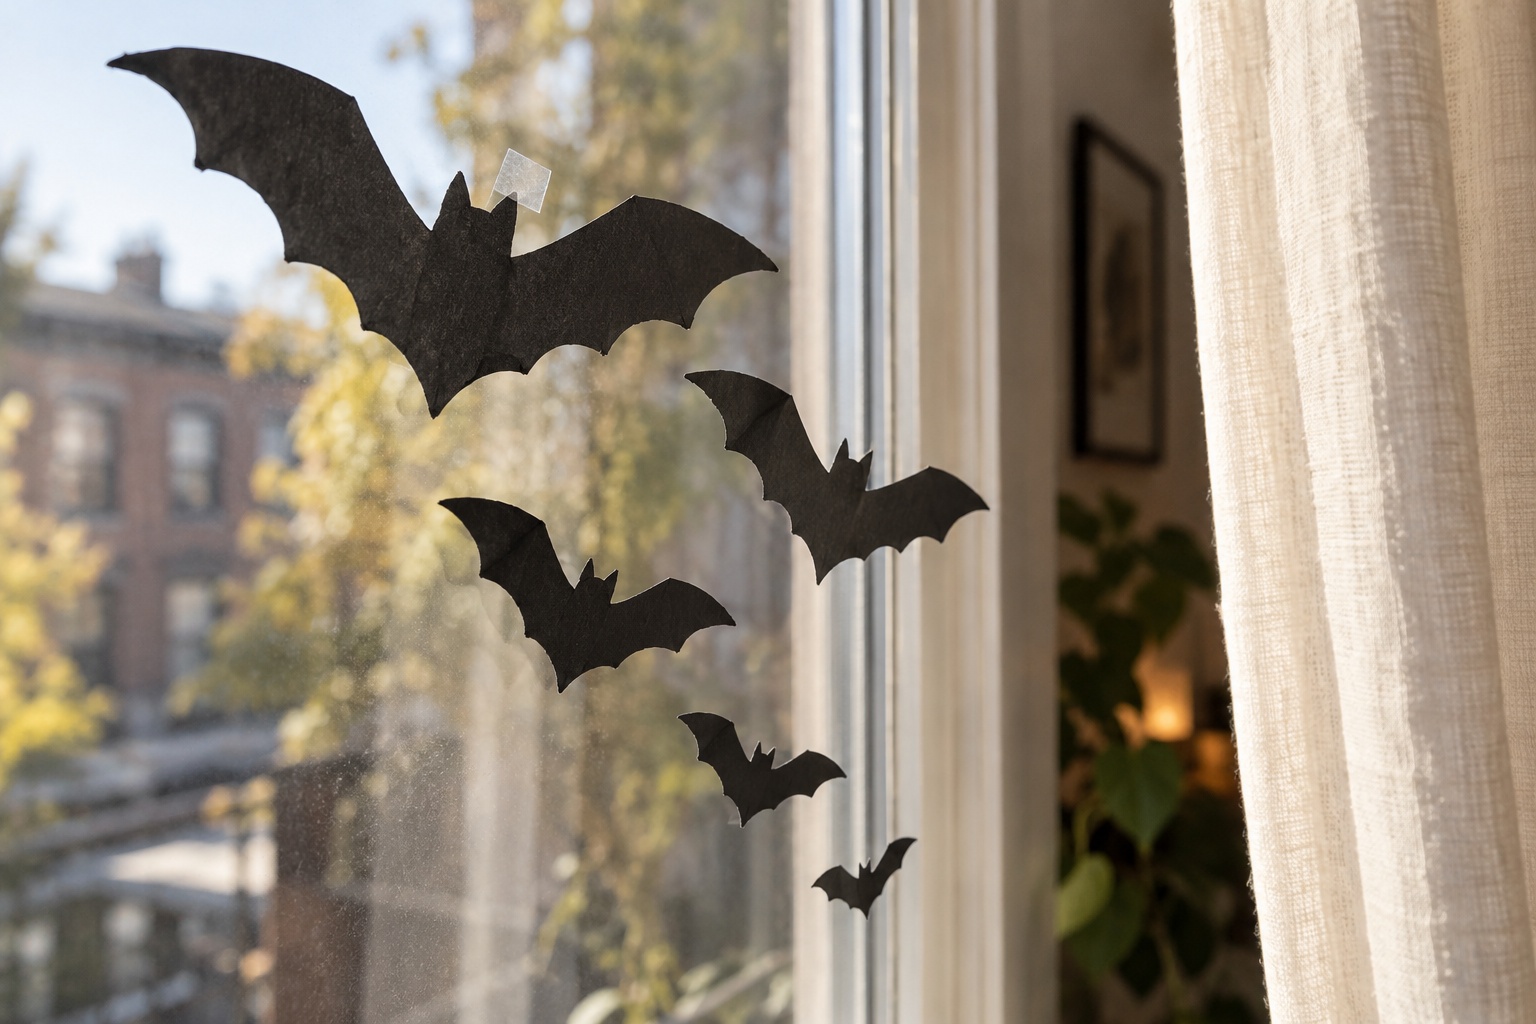
1. Create a Flying Bat Silhouette Display
Black paper bats are a classic Halloween window decoration because they immediately communicate the season without making a room feel overcrowded.
Start with a few sheets of black cardstock and draw bats in three different sizes. Cut out approximately eight to twelve shapes, depending on the dimensions of your window. Fold the wings slightly if you want a subtle dimensional effect, but keep the parts touching the glass flat.
Arrange the bats in a loose diagonal pattern so they appear to be flying toward one corner. Leave spaces between them rather than creating a solid black cluster.
If your glass is suitable, use tiny pieces of removable tape on the pane itself after testing a discreet spot. Avoid applying tape to the painted frame.
Styling tip: Position the largest bats near the bottom and smaller bats toward the top to suggest movement. The complete arrangement can usually be prepared in around 20 to 30 minutes.
2. Make Paper Jack-o’-Lantern Window Faces
For a cheerful Halloween look, create oversized jack-o’-lantern faces using orange and black craft paper. This idea works particularly well in kitchens, children’s rooms, and apartments where you want Halloween decor that feels playful rather than frightening.
Cut large pumpkin shapes from orange paper and add black triangle eyes, curved mouths, or silly expressions. Instead of making every face identical, use several expressions to give the display character.
For a cleaner silhouette visible from the street, cut the facial features directly into the paper pumpkin so natural daylight shines through the openings.
Arrange two or three pumpkins across the lower glass area, leaving the top portion mostly clear. This also helps preserve daylight in a smaller room.
Budget tip: Save unused cardstock and larger paper scraps for smaller bats or stars in another window.
3. Build a Haunted House Skyline
A miniature haunted town stretching across the bottom of a window creates a striking Halloween scene without requiring elaborate decorations.
Draw the outlines of crooked rooftops, narrow towers, chimneys, and uneven windows on black cardstock. Cut the buildings as one continuous strip or as several overlapping sections.
For a typical apartment window, begin with a skyline approximately six to ten inches tall, then adjust the height to suit the glass. A smaller skyline often looks better than one that blocks the entire view.
Place the paper buildings against the lower pane using a tested removable attachment method, or support them upright on the windowsill with folded cardstock bases.
Small battery-operated lights positioned behind the silhouettes can create the appearance of glowing windows after sunset.
Design tip: Use buildings of different heights and leave a clear section for a paper crescent moon.
4. Add Bare Branches and Crow Silhouettes
If you prefer a moody, understated Halloween aesthetic, try a black paper branch with two or three crow silhouettes.
Sketch a twisting tree branch on black cardstock, then cut separate birds that can be arranged along its length. Position the branch diagonally in one corner of the glass, allowing the rest of the window to remain open.
This design is particularly effective in rooms with beige curtains, warm white walls, or simple wooden furniture. The dark shapes introduce a spooky detail without competing with the existing interior.
For a larger window, extend the branch across two adjoining sheets of cardstock. Use careful, small attachment points on compatible glass rather than running long strips of tape across the window frame.
Styling tip: Keep the number of birds limited. A few well-spaced silhouettes create a more elegant composition than dozens of overlapping shapes.
Halloween Window Clings and Glass Decorations
Nonadhesive window clings can be especially convenient for renters because they are designed to attach to suitable smooth surfaces without conventional glue. Always check the product instructions and glass compatibility first.
They also offer a useful solution when you want seasonal decorations that can be removed and stored for another year.
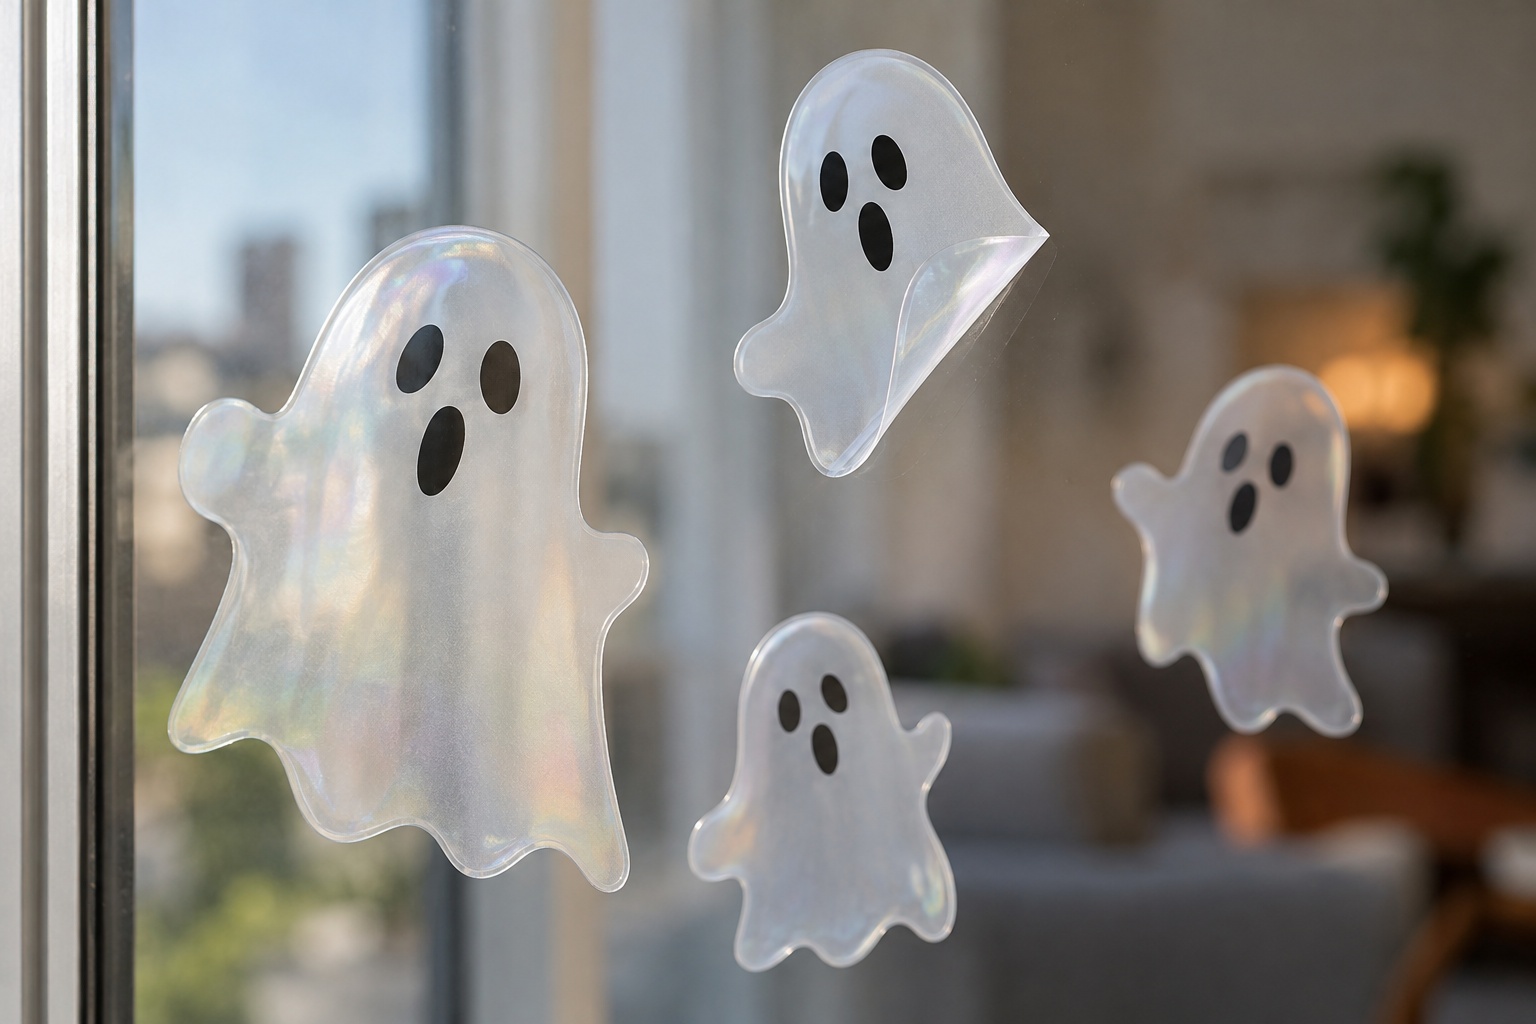
5. Arrange a Parade of Ghost Window Clings
Small white ghost clings can transform an ordinary apartment window into a playful Halloween display in just a few minutes.
Choose several ghost silhouettes with slightly different expressions or poses. Clean and dry the glass as directed by the cling manufacturer, then position the ghosts in a staggered arrangement.
For a balanced composition, place one larger ghost near the center and group smaller ghosts around it. Avoid arranging everything in a perfectly straight row unless you are deliberately creating a border.
These decorations are especially attractive when seen against darker outdoor surroundings at dusk. Warm room lighting behind the glass adds softness to the scene.
Renter tip: Select genuinely nonadhesive static clings when possible, and check whether the manufacturer approves them for coated or filmed windows. A product labeled removable is not necessarily nonadhesive.
6. Use Spider Clings in the Window Corners
Spider silhouettes work best when they appear to be crawling into the frame rather than covering the entire window.
Choose small black spider clings in several sizes and arrange them along the lower corner or one side of the pane. You can create a natural-looking trail by gradually increasing the distance between the spiders as they move upward.
Pair the spiders with a delicate cobweb design, but avoid filling every empty space. Leaving much of the glass visible makes the arrangement feel more intentional.
For windows divided into smaller panes, use one or two spiders per pane. This approach helps the decoration complement the window’s existing structure.
Styling tip: Keep spider decorations on the glass itself, away from curtain tracks, locks, and sliding-window mechanisms.
7. Make a Crescent Moon and Star Window Scene
Not every Halloween window needs pumpkins, ghosts, or bats. A moonlit night scene can feel equally seasonal while working beautifully with minimalist apartment decor.
Use a large crescent moon cling as your focal point and surround it with scattered stars. Choose warm white, cream, or muted gold designs for a softer appearance.
Arrange the moon slightly off-center so the display does not feel too symmetrical. Add a few smaller stars toward the opposite corner for visual balance.
If you prefer darker Halloween styling, introduce one or two black bat silhouettes crossing the moon. Otherwise, allow the celestial design to stand alone.
Small-space tip: This arrangement is effective on narrow bedroom windows because it occupies relatively little glass while still forming a complete scene.
8. Draw Temporary Spiderweb Corners
Washable window markers can be useful for creating custom Halloween patterns without permanently altering your glass, provided the product is specifically appropriate for your window surface.
Start by drawing several thin lines radiating from an upper corner. Connect the lines with curved sections to form a simple spiderweb.
Work slowly and keep the lines relatively open. Thick, crowded webs can make a small window look messy, particularly when viewed from a distance.
Use a white or pale gray window marker for a softer effect, or choose black for a stronger silhouette against bright daylight.
Before drawing the full design, test the marker and cleaning procedure on a discreet area. Follow the manufacturer’s removal directions, especially if the glass has a special coating or applied film.
Important: Do not substitute permanent markers, ordinary paint, or craft paints unless they are explicitly approved for the surface and your rental agreement permits their use.
Cozy Halloween Windowsill Decor for Apartments
If you would rather avoid sticking anything to the glass, a windowsill display can be an excellent alternative. Small decorative objects create atmosphere while leaving the window surface untouched.
Use stable trays or protective mats when needed, and check that decorations will not interfere with curtains or window operation.
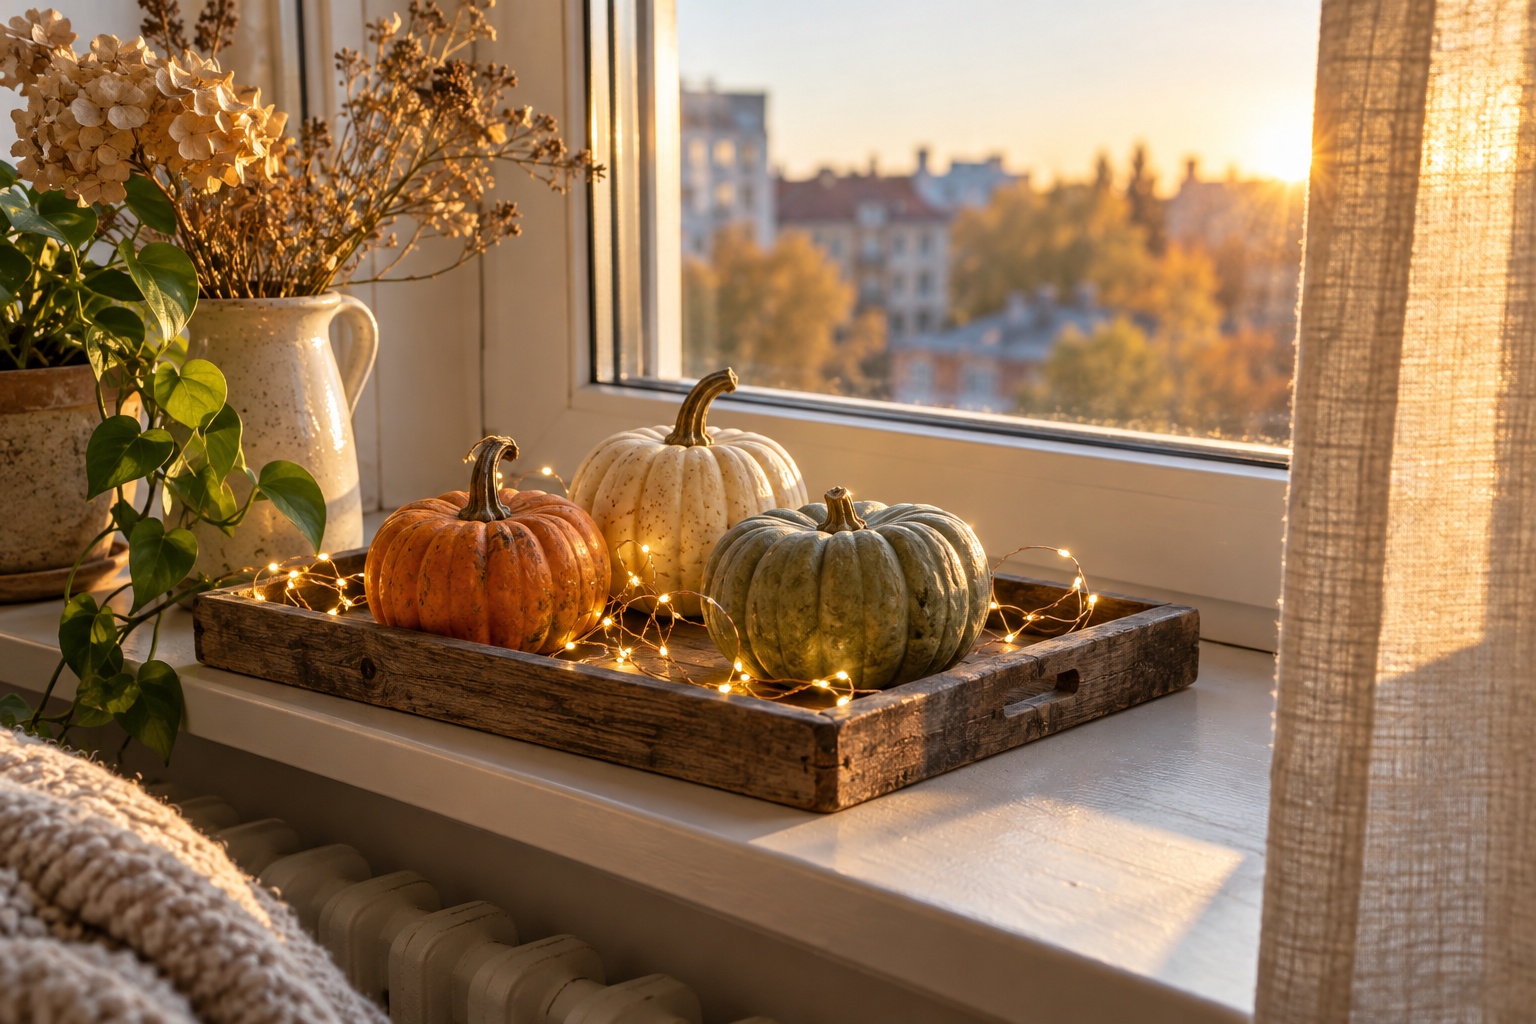
9. Style Mini Pumpkins With Warm Fairy Lights
A row of miniature pumpkins illuminated by warm fairy lights is one of the simplest Halloween window decor ideas for renters.
Choose three to five small pumpkins in a combination of orange, cream, and muted green. Arrange them at slightly different distances from the glass rather than forming a perfectly straight line.
Place a small battery-powered LED light string between the pumpkins, allowing a few bulbs to remain visible. The warm glow looks particularly inviting from outside once the sky begins to darken.
A wooden tray can help contain the arrangement and protect a delicate windowsill. Avoid placing heavy objects on a narrow ledge or close to the edge.
Styling tip: Combine one medium pumpkin with two smaller ones for an easy layered display. This arrangement also works after Halloween when the spooky decorations have been removed.
10. Display a Freestanding Black Cat Silhouette
A black cat can become a charming Halloween focal point without requiring any adhesive or mounting hardware.
Cut a sitting cat silhouette from sturdy black cardstock or lightweight foam board. Add a folded paper support to the back so the cat stands upright on the windowsill.
Position it against the glass so its outline is clearly visible from outside. A gently curved tail and pointed ears make the shape recognizable even at a distance.
For extra interest, place a small cream pumpkin beside the cat and leave the rest of the sill relatively clear.
If the window receives strong drafts, use a wider base or a purpose-made freestanding decoration rather than trying to attach the silhouette to painted trim.
Design tip: A solid silhouette usually looks better from the street than a cat with numerous tiny cutout details.
11. Create a Miniature Witch’s Potion Display
For a more whimsical Halloween atmosphere, arrange several small decorative bottles on a tray near the window.
Use lightweight plastic or stable glass bottles in amber, smoky gray, or clear finishes. Fill them with dried leaves, decorative beads, or rolled paper labels. There is no need to use real liquids, which could spill on a rental windowsill.
Cluster the bottles at different heights and place a miniature pumpkin or paper bat silhouette nearby. Keep any labels subtle if you prefer an editorial look.
The bottles catch natural light during the day and create interesting shapes when illuminated from behind in the evening.
Safety tip: Keep bottles away from the window edge and use a protective tray. Avoid placing fragile glass where children or pets could knock it over.
12. Hang a Lightweight Autumn Leaf Mobile
A suspended paper leaf mobile brings gentle movement to a Halloween window while keeping the overall appearance warm and seasonal.
Cut several leaf shapes from rust, brown, cream, and muted orange cardstock. Tie each leaf to a length of lightweight thread, varying the lengths to create a layered effect.
If you already have a suitable curtain rod, use removable hanging loops or clips supported by the rod itself. Avoid drilling new brackets or attaching hooks directly to painted walls.
Hang the leaves where they will not catch in the blinds, sliding mechanism, or window locks.
This idea looks particularly attractive alongside pumpkins, bare branches, and warm lighting.
Styling tip: Use approximately seven to nine paper leaves for a small window. More decorations are not always necessary, especially when natural daylight is part of the room’s appeal.
Halloween Window Lighting and Layered Evening Displays
Lighting can make even the simplest Halloween scene feel special. The most attractive arrangements use gentle contrast rather than excessive brightness.
Battery-powered LED lights are useful because they reduce the need to run cords across a window. Follow the lighting manufacturer’s installation instructions and keep decorations clear of heat sources.
13. Create a Soft Curtain of Fairy Lights
A lightweight curtain of warm white LED lights creates a cozy Halloween background without making the room feel like a haunted attraction.
Choose a short battery-operated light curtain suitable for indoor use. If the existing curtain rod and its hardware can safely support the weight, suspend the light curtain using compatible removable clips or loops.
Allow the strands to hang vertically behind your paper silhouettes or window clings. Avoid placing lights where the window closes or where cords can become pinched.
For the most balanced look, use only a few strands and keep the brightness moderate. Warm white bulbs generally complement orange pumpkins and black silhouettes especially well.
Design tip: Keep the lights slightly behind the decorative shapes so the silhouettes remain visible rather than disappearing against bright bulbs.
14. Make Glowing Paper Ghost Lanterns
Small ghost lanterns offer a soft, playful Halloween effect without requiring traditional candles.
Start with two or three small battery-operated LED tea lights. Place each inside an appropriate translucent, flame-free lantern or a stable decorative holder designed for LED illumination.
Add a lightweight white paper ghost sleeve around the outside, leaving enough clearance for switches, ventilation requirements, and the manufacturer’s instructions.
Draw simple black eyes and a small mouth on each ghost. Arrange the lanterns along the windowsill, varying their heights slightly for interest.
These lanterns work well in bedrooms, reading corners, and living rooms where you want seasonal lighting without harsh colors.
Safety tip: Use LED lights only. Never place an open flame inside a paper ghost decoration, and keep battery compartments accessible.
15. Build a Layered Halloween Shadow Scene
A small freestanding shadow scene can make a window look like a miniature Halloween theater.
Cut a haunted house, a fence, and a few trees from black cardstock. Attach folded cardstock supports so the silhouettes stand independently on a tray or wide windowsill.
Place the house at the back, the fence in the middle, and a small tree toward the front. This arrangement creates visible depth without requiring a complicated structure.
Add a dim battery-operated LED light behind the scene to emphasize the outlines after dark. Aim the light away from the viewer’s direct line of sight so the glow feels soft rather than glaring.
Beginner tip: Start with only three silhouette layers. Adding too many shapes can make the display difficult to read from outside.
16. Create a Coordinated Halloween Window Vignette
The final idea combines several small elements into one carefully balanced scene that looks attractive from both sides of the glass.
Choose one focal motif, such as a crescent moon, a haunted house, or a group of flying bats. Position it on the pane using an appropriate removable method, then arrange two or three complementary objects on the windowsill.
For example, pair black bat silhouettes with cream pumpkins, a small wooden tray, and one warm LED light string. Alternatively, combine ghost clings with a black cat silhouette and miniature lanterns.
Keep the colors consistent and avoid using every Halloween decoration you own. A limited palette of black, warm white, and muted orange often makes a small apartment window feel more thoughtfully styled.
Finally, step outside or view the window from the street where it is practical and safe. Make any adjustments needed to improve the spacing or visibility.
Finishing tip: Take a photograph from inside and another from outside. These two perspectives can reveal crowded areas that are not obvious while you are decorating.
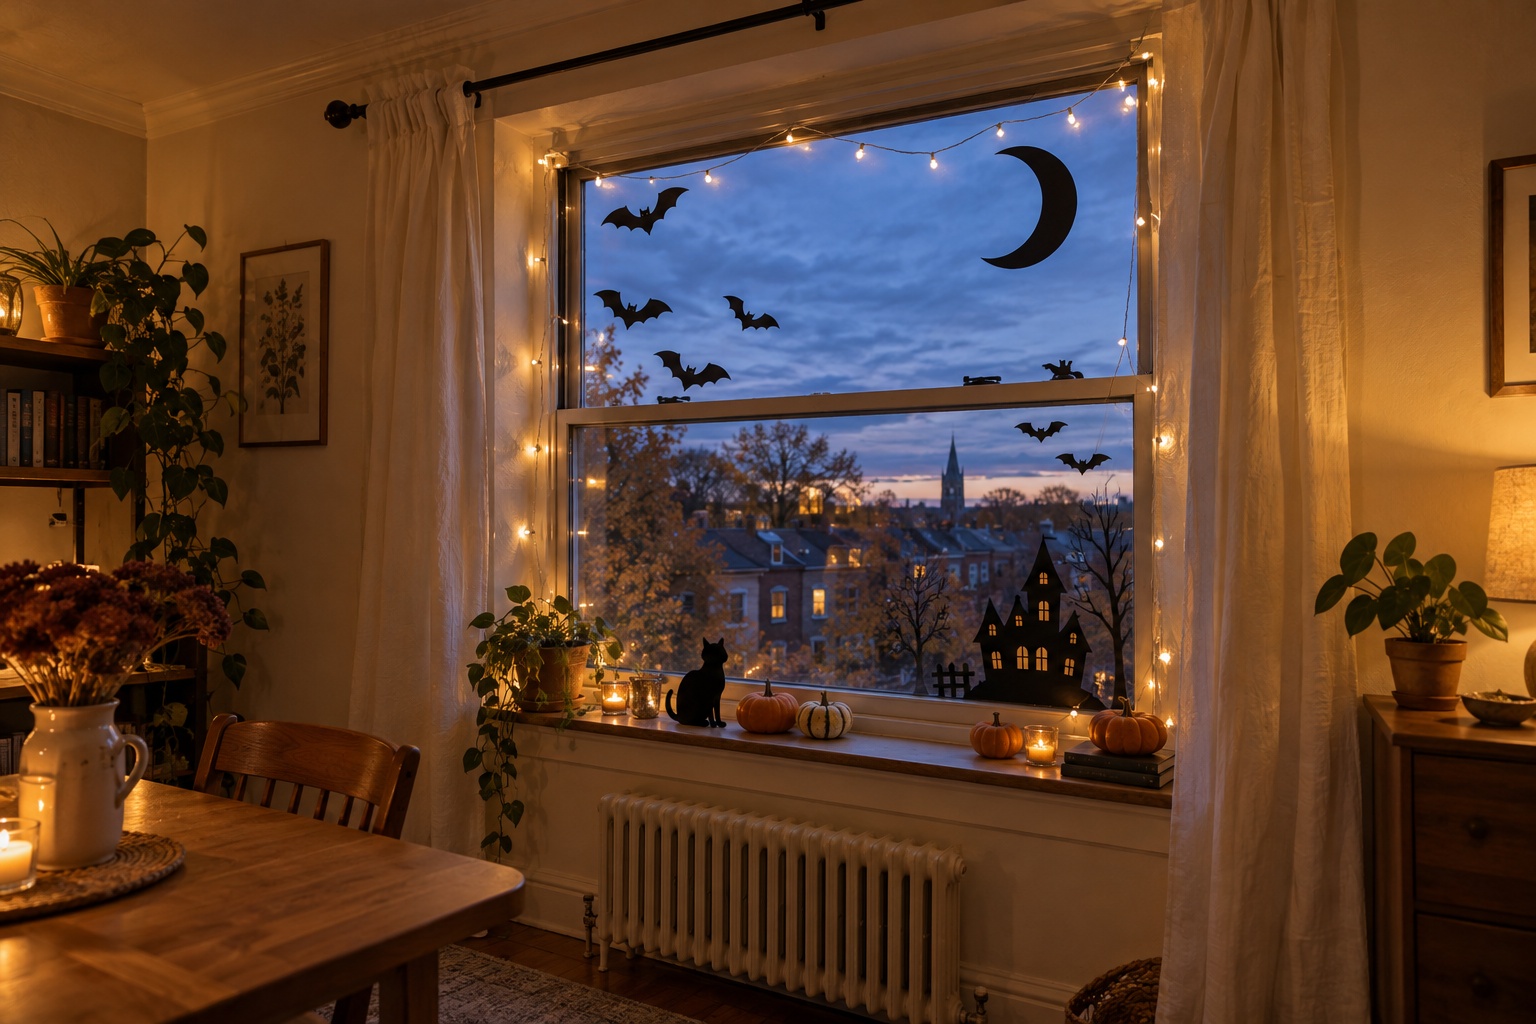
How to Decorate a Halloween Window Step by Step
If you are decorating your first apartment for Halloween, you do not need to attempt all 16 ideas. A single coordinated window can make a noticeable difference.
Use this beginner-friendly process to create a finished display without unnecessary purchases or permanent changes.
- Measure the window. Record the approximate width and height, including the usable windowsill space. Make sure the decoration will not obstruct locks, blinds, or emergency access.
- Choose one main idea. Select paper bats, ghost clings, or a haunted skyline as the central visual element.
- Pick a simple color palette. Black, cream, and orange are easy to coordinate. Warm white lighting ties these colors together.
- Gather materials. Prepare cardstock, scissors, approved removable mounting materials, a cloth, and battery-operated lighting.
- Prepare the surface. Clean suitable glass according to its care instructions and allow it to dry before applying any compatible decorations.
- Test before committing. Check the manufacturer’s recommendations and test tape, markers, or clings discreetly where appropriate.
- Arrange the largest shapes first. Place the focal decoration, then add smaller accents while leaving enough clear glass for visual balance.
- Add windowsill objects and lighting. Keep objects stable, avoid heat sources, and make sure nothing interferes with the operation of the window.
- Check the nighttime appearance. Turn on the LED lights at dusk and adjust the layout so your main silhouettes remain recognizable.
- Plan for removal. Keep product instructions and original cling backing sheets so taking down and storing the decorations is easier.
A small window using a few paper cutouts and a simple LED arrangement might take approximately 30 to 60 minutes to decorate, excluding shopping and extensive cutting. A larger, layered display will naturally require more time.
The Halloween Window Decor Mistakes Renters Should Avoid
A decoration that looks temporary is not necessarily suitable for a rental property. The biggest avoidable mistake is assuming every removable product is safe for every window surface.
Do not attach ordinary tape to painted window frames without approval. Removing it could pull away an existing finish, especially if the paint is old or poorly bonded.
Avoid permanent window paint and adhesives. Products that require aggressive scraping or solvents are poor choices unless the manufacturer specifically approves the cleaning method for your glass.
Do not assume static clings work on every window. Some coatings, specialty glass surfaces, and applied films may have restrictions. Read the product guidance before installation.
Keep windows and escape routes functional. Do not block emergency exits, locks, handles, or necessary ventilation with paper scenes, light curtains, or heavy decorative objects.
Avoid overloaded windowsills. Heavy pumpkins, unstable bottles, and fragile objects near the edge create unnecessary risks. Use lightweight props and stable trays instead.
Do not leave lighting safety as an afterthought. Use lighting rated for the intended indoor location, follow the manufacturer’s instructions, and keep paper away from heat sources.
No decorating method can guarantee protection against every type of damage or deposit dispute. Choosing appropriate materials, following product directions, and checking your lease can significantly reduce avoidable problems.
How to Make Apartment Halloween Windows Look More Expensive
Creating an attractive Halloween window is more about proportion and editing than buying expensive decorations.
Start with a consistent color palette. Black silhouettes create structure, warm white lights soften the scene, and a little orange adds seasonal character. Avoid introducing too many competing colors or lighting effects in a small area.
Next, vary the size of your decorations. One large bat, moon, or haunted house surrounded by smaller shapes creates a clear focal point. A window filled with identical objects can feel repetitive and visually flat.
Consider the room surrounding the window as well. Natural linen curtains, a wooden tray, matte ceramic decorations, and understated LED lighting can make inexpensive craft materials appear more cohesive.
Finally, use negative space deliberately. Leaving sections of the window undecorated allows sunlight to enter and helps the decorative shapes remain visible from the street.
A few carefully chosen pieces usually produce a more polished result than covering every available surface.
How to Remove and Store Halloween Window Decorations
Once Halloween is over, remove decorations carefully rather than pulling everything off the glass at once.
Start by switching off the lights and removing any electrical accessories. Take freestanding objects off the windowsill before working on decorations attached to the glass.
For static clings, follow the manufacturer’s removal instructions. Lift them carefully from an approved surface and place them back on their original backing sheets if the product is reusable.
If you used removable tape, follow its specified removal method and avoid scraping the glass or pulling aggressively near painted trim.
Washable window marker designs should be cleaned using the method recommended for both the marker and the window surface. Avoid abrasive pads or harsh solvents unless explicitly approved.
Store paper silhouettes flat between sheets of clean paper or inside a folder. Keep string lights loosely coiled, and remove batteries for long-term storage when recommended by the product manufacturer.
Label the storage container so you can find everything easily next October.
Frequently Asked Questions About Halloween Window Decor for Renters
Can Halloween window clings damage glass?
Many nonadhesive static-cling products are intended for smooth glass, but compatibility depends on the specific product and surface. Check the manufacturer’s directions before using them on coated glass, specialty windows, or applied films. Do not assume a product is safe solely because it is advertised as removable.
What is the cheapest way to decorate apartment windows for Halloween?
Black cardstock silhouettes are among the most affordable options. A few sheets of paper, scissors, and a simple template can create bats, pumpkins, or haunted houses. If you already own battery-operated fairy lights, you can use them to add evening atmosphere without buying an entirely new display.
How can I make Halloween window decor visible from outside?
Use recognizable silhouettes, leave enough space between shapes, and position warm lighting behind the main design. Larger shapes are generally easier to recognize from a distance than intricate small details. Check the window from outside when possible and adjust the arrangement accordingly.
Can I decorate windows without using tape?
Yes. Freestanding windowsill decorations, nonadhesive clings approved for your window, and lightweight decorations supported by suitable existing curtain hardware can all reduce reliance on tape. The appropriate choice depends on the window type and the rental rules.
What Halloween window decorations work best in a small apartment?
Small apartment windows often look best with one main motif and minimal supporting details. A cluster of paper bats, a few ghost clings, or miniature pumpkins with warm LEDs can create a finished display without making the room feel crowded or blocking too much natural light.
Final Thoughts on Renter-Friendly Halloween Window Decor
Creating memorable Halloween windows does not require permanent changes, complicated installations, or a large decorating budget.
Paper silhouettes, compatible static clings, miniature pumpkins, and warm LED lighting offer flexible ways to celebrate the season while respecting the limitations of a rental home.
Start with one idea that fits your space, choose materials carefully, and build the display gradually. Whether you prefer charming ghosts or dramatic haunted-house silhouettes, the best arrangement will feel festive, balanced, and appropriate for your windows.
With a little planning, even a single apartment window can become one of the most inviting Halloween features in your home.