Dollar Store Halloween DIY Decor Can Look Surprisingly Expensive
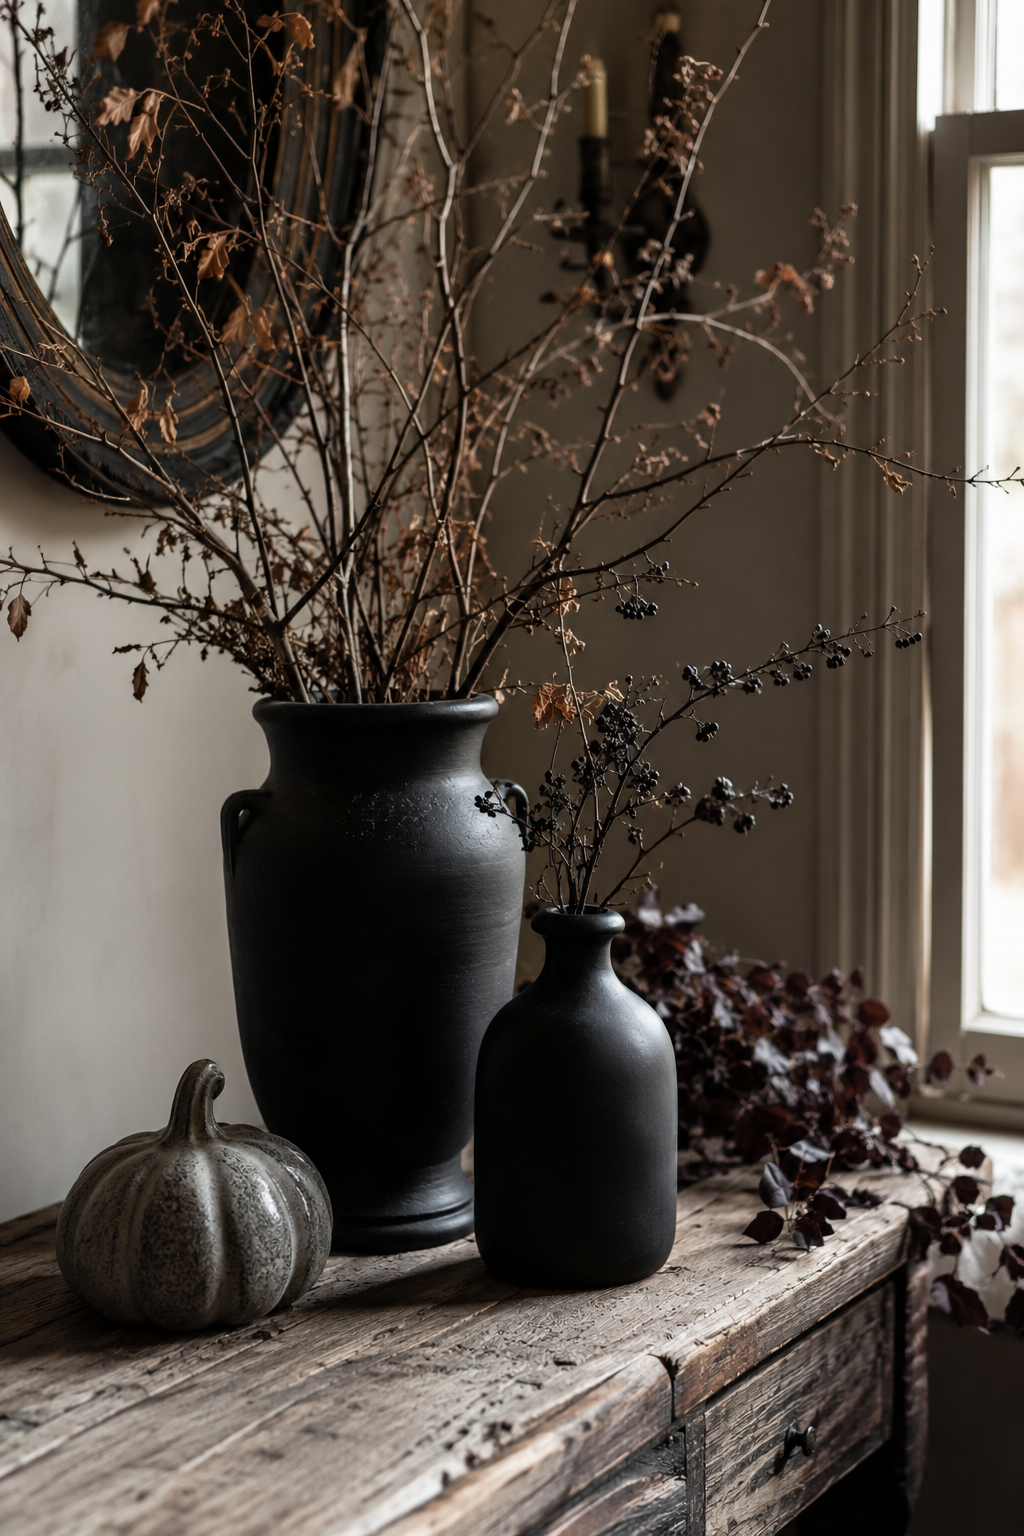
Decorating for Halloween on a small budget does not mean your home has to look like it was filled with inexpensive plastic decorations. Some of the best dollar store halloween diy decor starts with very ordinary seasonal pieces and transforms them through color, texture, repetition, and thoughtful styling.
The secret is rarely an elaborate craft technique. In many cases, the biggest improvement comes from removing the shiny plastic appearance that makes inexpensive decor instantly recognizable. Matte paint, muted colors, dried branches, aged finishes, simple fabric, and restrained arrangements can make even basic dollar store pieces feel much more intentional.
You also do not need to transform every object in the seasonal aisle. A few carefully chosen pieces usually create a stronger result than filling every available surface. Look for items with useful shapes rather than perfect finishes. Pumpkins, skulls, plastic vessels, candleholders, frames, trays, spiders, faux branches, and basic glass containers are excellent starting points.
These 22 ideas focus on affordable Halloween projects that can blend naturally into a cozy, moody, or slightly spooky home instead of looking like temporary party decorations.
Before You Start: The Paint Trick That Changes Everything
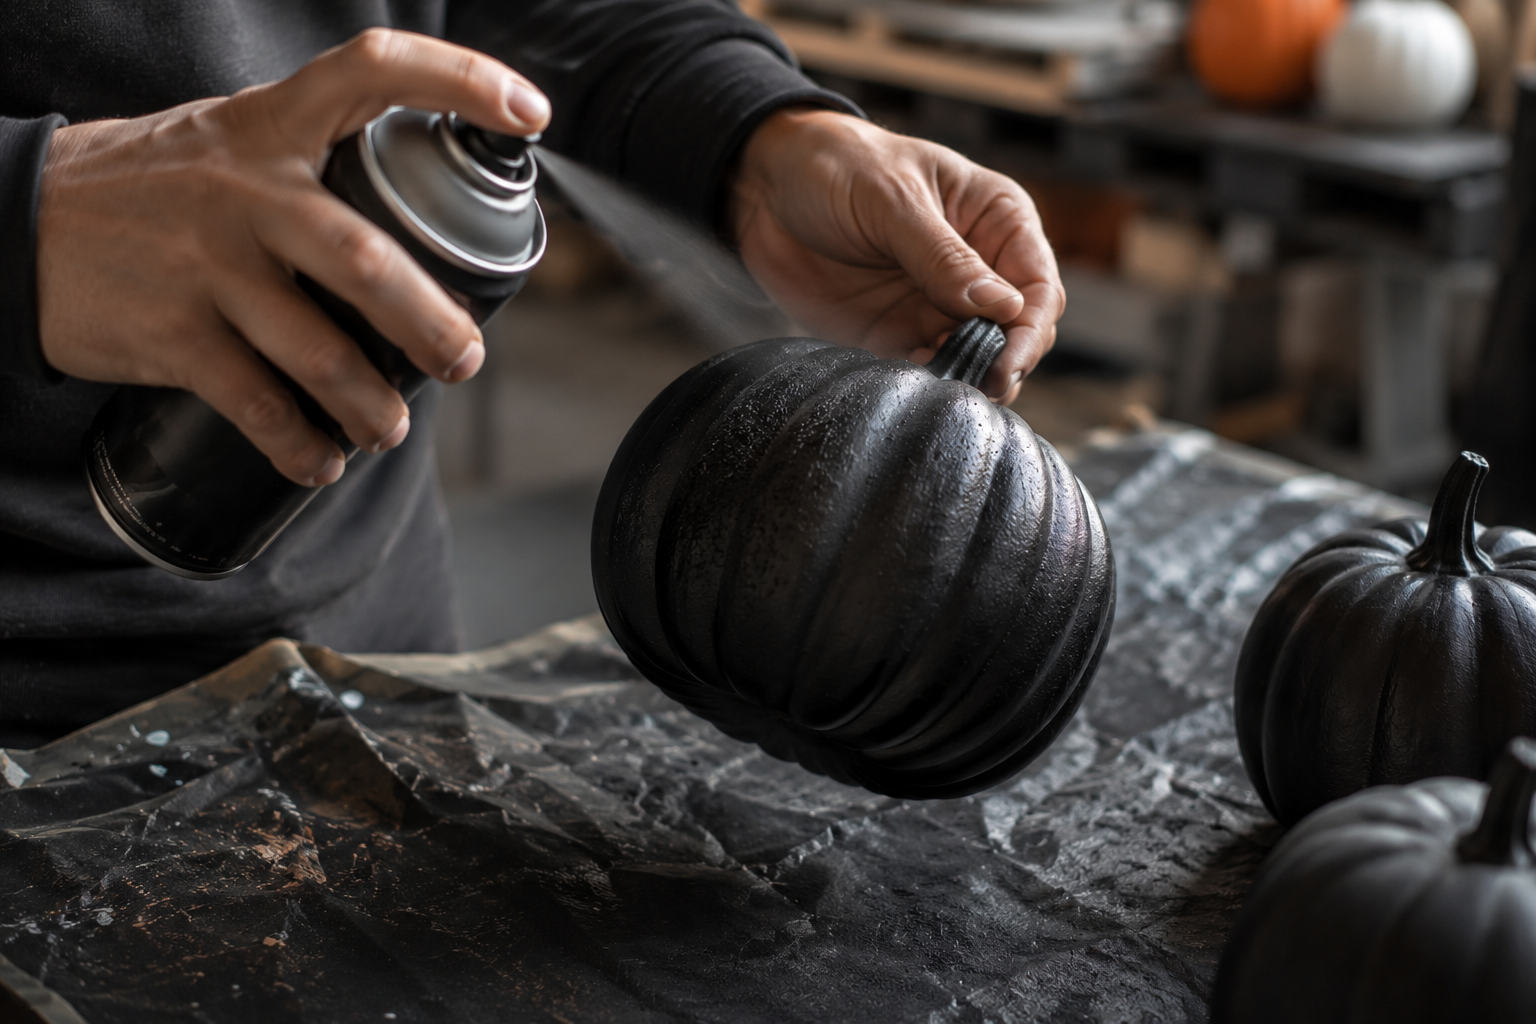
If there is one technique worth learning for dollar tree halloween diy projects, it is how to unify inexpensive objects with paint.
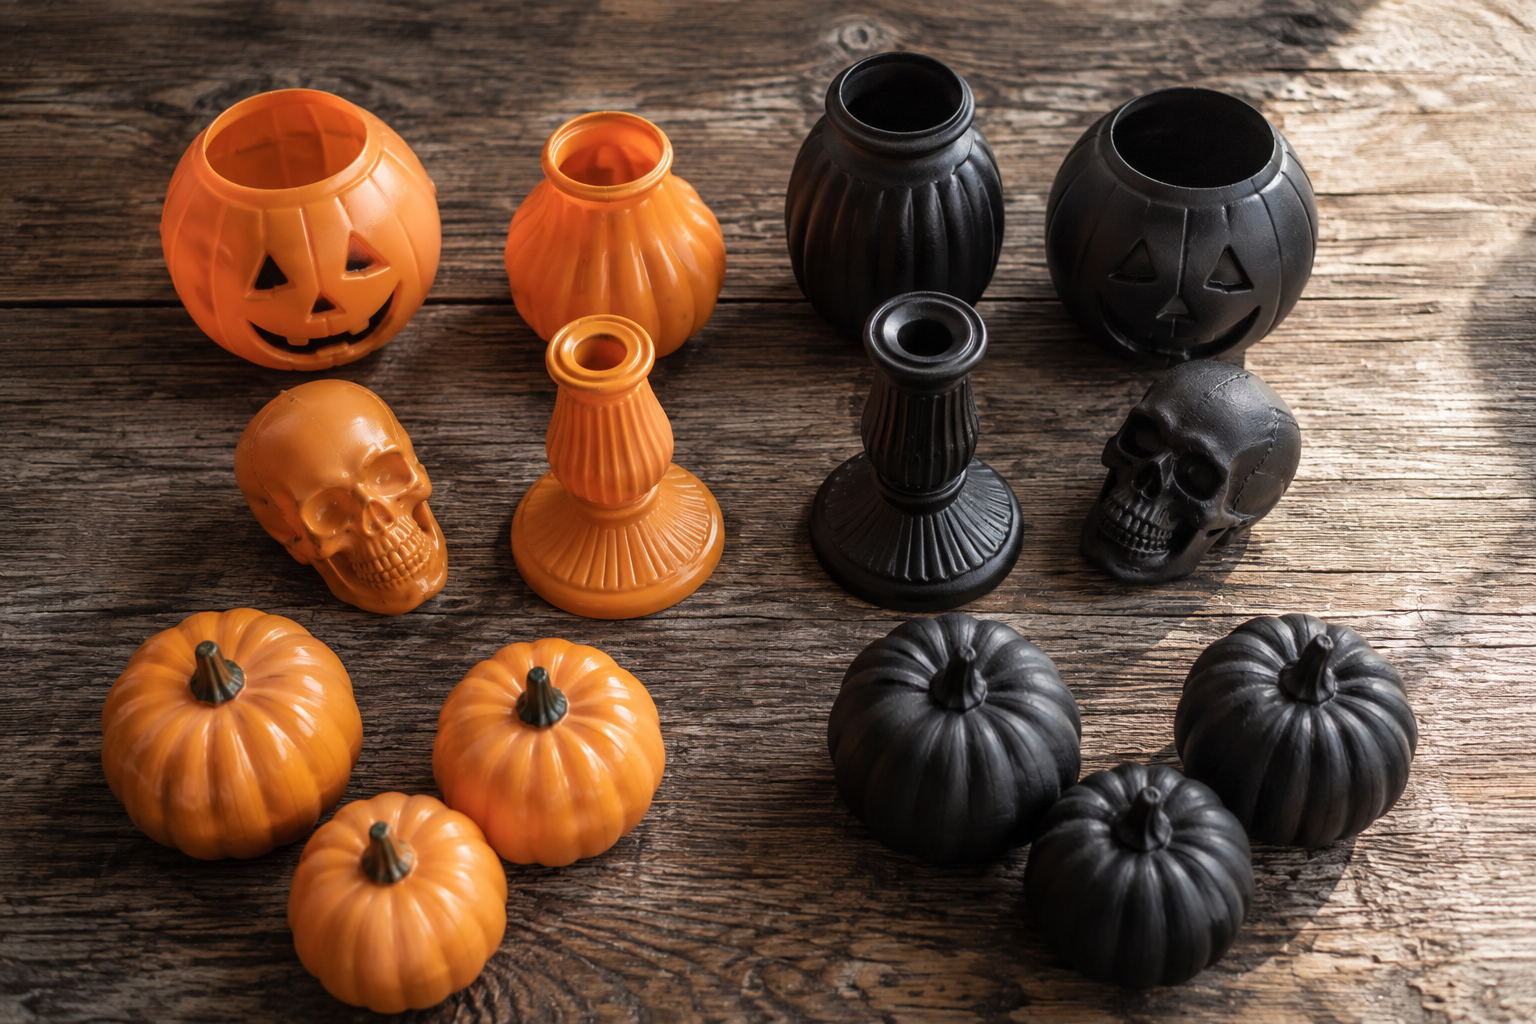
Bright orange plastic, shiny black finishes, fake metallic coatings, and glitter can make inexpensive decor difficult to integrate into an otherwise calm room. Covering those surfaces with a consistent matte finish immediately changes the visual effect.
Matte black is especially useful for Halloween because it works with almost every decorating style. Warm ivory, stone gray, muted taupe, aged bronze, and dark brown are also excellent options.
Before painting plastic, clean the surface and follow the preparation instructions for the paint you choose. Use a product appropriate for the material, work in a properly ventilated area, and follow the manufacturer’s directions for application and drying.
Instead of trying to make every item look perfectly new, embrace a little variation. Subtle unevenness, dry-brushed edges, or a slightly weathered finish can actually help inexpensive Halloween pieces look older and more collected.
1. Turn Plastic Vases Into Matte Black Branch Vessels
One of the easiest transformations starts with a basic plastic vase. Ignore its original color and focus on the silhouette. Tall urns, narrow bottles, and slightly oversized vessels work particularly well.
Give the vase a matte black finish and fill it with a few irregular dried branches. The contrast between the simple dark vessel and organic branches creates a dramatic Halloween arrangement without relying on obvious seasonal graphics.
For a more natural display, leave plenty of empty space between branches instead of creating a full bouquet.
2. Give Plastic Pumpkins a Chalky Matte Finish
Bright plastic pumpkins are common dollar store finds, but their shiny finish can make them difficult to style. A muted paint treatment completely changes their character.
Try matte black for a gothic look, warm cream for neutral fall decor, or muddy taupe for something understated. You can also combine two or three related colors rather than painting every pumpkin identically.
Group them in odd numbers and mix different sizes. The repetition makes them feel like a deliberate collection rather than individual inexpensive decorations.
3. Create an Aged Stone Skull
Plastic skulls have interesting shapes but often come with an overly glossy finish. Transform one using layered gray, charcoal, and off-white paint to suggest weathered stone.
Allow darker tones to remain around the eyes, jaw, and deeper crevices. Lightly applying a paler shade to raised areas can emphasize the sculptural details.
Style the finished skull beside old books, a matte candleholder, or dried foliage instead of surrounding it with several other novelty decorations.
4. Make a Minimal Black Branch Centerpiece
Collect dry fallen branches or use inexpensive faux branches and place them in a simple painted vessel. Keep the arrangement intentionally sparse.
For a subtle Halloween detail, attach a few small black paper bats or lightweight spiders. The decorations should feel secondary to the branch structure rather than covering every inch.
This is one of the easiest halloween decor hacks for a dining table, console, or fireplace mantel.
5. Upgrade Basic Candleholders With One Finish
Different candleholder shapes can look surprisingly cohesive once they share the same finish. Choose several inexpensive holders with interesting silhouettes and paint them matte black, aged bronze, or another restrained shade.
Arrange them at different heights. Battery-operated candles can add a warm evening glow without introducing another strong color.
The repeated finish is what makes mismatched pieces feel like a curated set.
6. Turn Dollar Store Frames Into Gothic Art Displays
Small inexpensive frames can become useful Halloween accents after a simple dark makeover. Paint ornate frames matte black or dark brown and fill them with your own printable silhouettes, botanical drawings, abstract moon imagery, or vintage-inspired artwork that you have permission to use.
For a more elevated arrangement, limit the palette inside the frames to black, cream, sepia, and muted gray.
7. Make a Moody Apothecary Bottle Collection
Save or buy a few inexpensive glass bottles in different shapes. Remove colorful labels and keep the bottles clear, smoky, amber, or dark.
Add simple handmade paper labels if desired, but avoid filling every bottle with large novelty graphics. The shapes and glass textures can provide most of the visual interest.
Arrange the bottles together on a small tray with dried stems and one candle for a restrained apothecary-inspired display.
8. Transform a Plastic Tray Into an Aged Display Piece
Dollar store trays are useful because they help visually contain several small decorations. Even a lightweight plastic tray can look much better after being painted in a dark matte or aged metallic finish.
Use it to group a small pumpkin, candleholder, dried leaves, and decorative skull. Keeping these pieces within one defined area makes the arrangement look intentional and prevents Halloween decor from spreading across every surface.
9. Create a Black-and-Cream Pumpkin Collection
If orange does not fit your interior, create a limited pumpkin palette. Paint several inexpensive pumpkins in matte black, warm cream, and one soft neutral such as taupe.
Use different sizes but repeat the same colors throughout the room. This simple approach works particularly well in small spaces because the decorations coordinate rather than compete.
10. Make a Dried Botanical Halloween Wreath
A basic wreath form can become an understated Halloween decoration with dried or realistic faux foliage.
Choose dark leaves, bare twigs, dried grasses, and muted brown stems. Keep the arrangement slightly asymmetrical rather than making a perfectly full circle.
A narrow black ribbon can finish the design without making it feel overly decorative.
11. Build a Mini Haunted Village in One Color
Small decorative houses can feel much more sophisticated when their mismatched colors disappear. Paint several miniature houses in the same matte black or charcoal finish.
Arrange them together on a shelf or console and place warm battery-operated lights nearby or behind the grouping. Their silhouettes become the focus.
This is an especially effective way to transform cheap halloween crafts into decor that feels cohesive.
12. Turn Plastic Spiders Into Subtle Shelf Details
Instead of covering an entire wall with plastic spiders, use only a few. Matte black spiders can disappear partially into a dark shelf arrangement, creating a detail that visitors notice after looking more closely.
Place one near a stack of books, another beside a vessel, or a few along dried branches. Restraint makes the effect more interesting.
13. Make a Weathered Faux-Stone Pumpkin
For an alternative to plain black paint, give a plastic pumpkin a stone-inspired finish. Layer soft gray and warm off-white tones, allowing small variations to remain visible.
The goal is not photorealistic stone. You simply want to reduce the plastic shine and introduce enough visual texture that the pumpkin feels more substantial.
Pair it with real dried foliage or weathered wood to reinforce the natural finish.
14. Create Ghosts From Simple White Fabric
Minimal fabric ghosts can look charming when their shapes are simple and the material has visible texture. Use inexpensive white or cream fabric over a lightweight form to create a soft ghost silhouette.
Avoid excessive embellishment. Two small dark eyes are often enough.
Group two or three at slightly different heights on a console or shelf. Neutral fabric allows them to blend with existing fall decor rather than dominating the room.
15. Upgrade Faux Leaves With a Muted Palette
Artificial fall leaves often use extremely saturated orange and yellow shades. If the material is suitable for your chosen paint or craft medium, toning down some of those colors can make the foliage easier to style.
Look for rusty brown, muted burgundy, tan, and near-black accents. Combine the finished foliage with real dried branches whenever possible.
Natural materials help visually balance artificial ones.
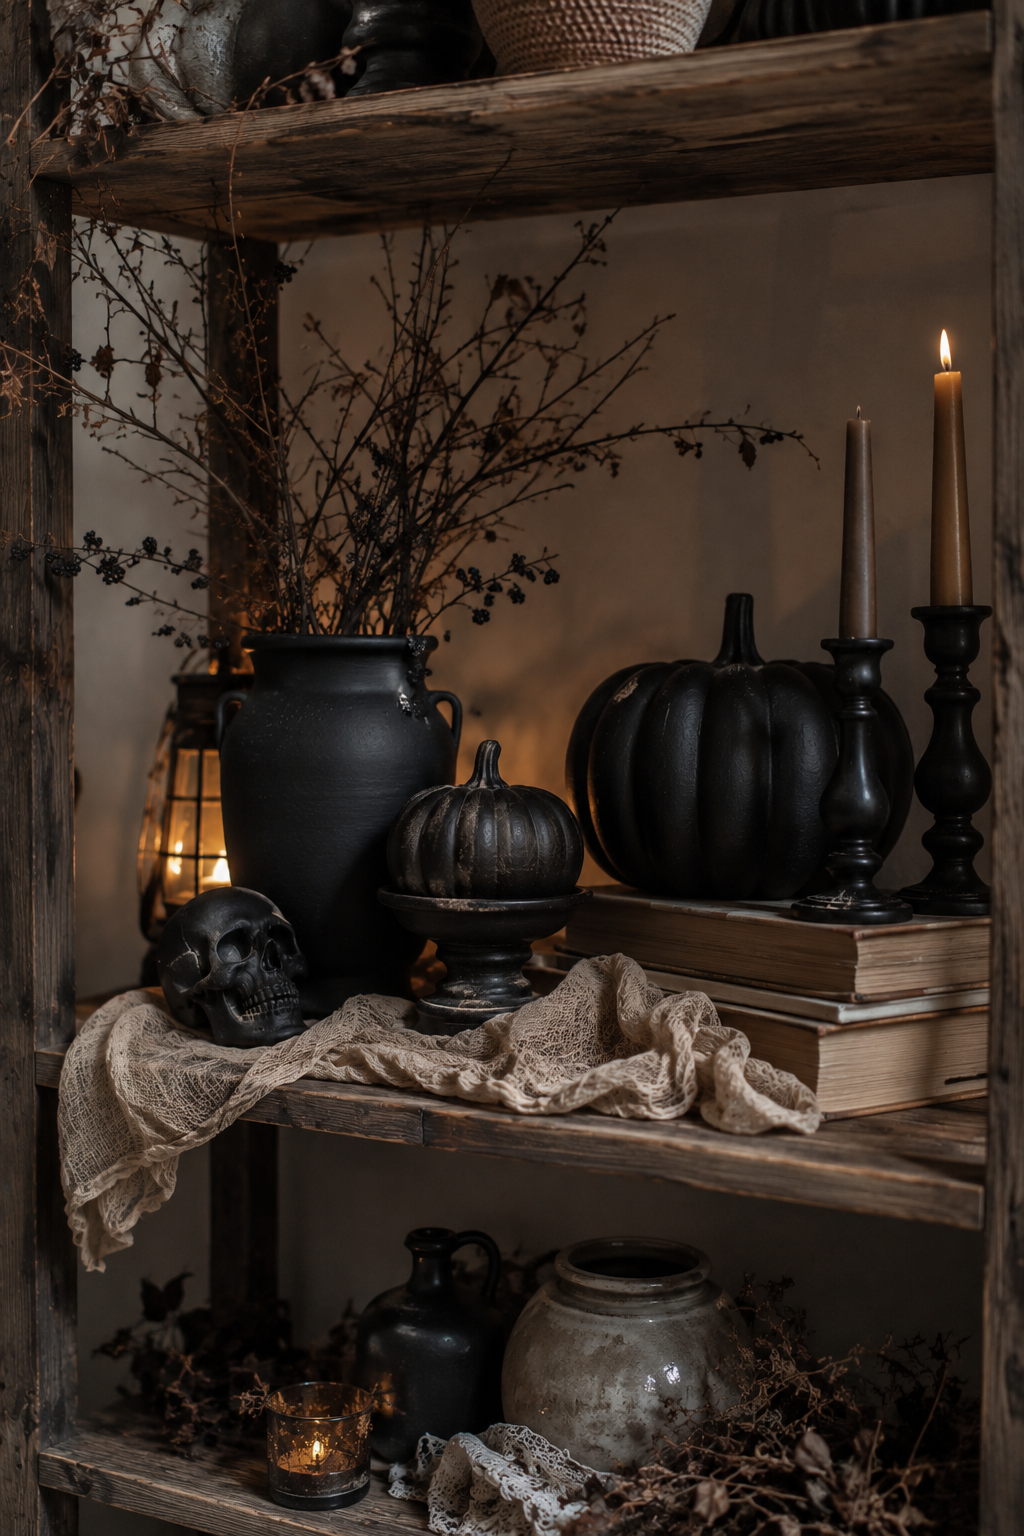
16. Create a Moody Halloween Shelf in Layers
A good Halloween shelf does not require dozens of decorations. Start with one tall item, such as a branch-filled vase. Add a medium element, such as a framed print or pumpkin, followed by one or two smaller objects.
Vary the height and depth of the arrangement. Some pieces should sit toward the back while others overlap slightly in front.
Then stop before every empty area is filled. Negative space is one of the easiest ways to make budget decor look more polished.
17. Make Black Botanical Specimen Frames
Use inexpensive frames to display pressed leaves, dried stems, or botanical silhouettes against cream paper. Paint the frames black to connect them visually with the rest of your Halloween decor.
These pieces can stay on display through much of fall because they suggest the season without relying on Halloween slogans or novelty imagery.
18. Turn Basic Bowls Into Halloween Pedestal Displays
Look for inexpensive bowls, plates, and candleholders that can be combined visually into a pedestal-style display. If you permanently assemble pieces, use an adhesive appropriate for the specific materials and follow its safety instructions.
A single dark finish can make the separate components read as one object.
Use the finished stand for lightweight decorative pumpkins, faux fruit, or other non-food seasonal objects unless the materials and finish are specifically food-safe.
19. Create an Antique-Looking Mirror Accent
A small decorative mirror can become a moody Halloween accent without permanently distressing the reflective surface. Paint the frame dark and style it behind dried branches, candles, or other decor so reflections become part of the arrangement.
Mirrors are especially useful in small rooms because they amplify candlelight and add visual depth without requiring another large decorative object.
20. Make a Simple Raven-and-Branch Arrangement
A small faux raven can look surprisingly effective when it is treated as one detail rather than the entire theme.
Place a single raven on a bare branch, beside a dark vessel, or among a restrained stack of vintage-style books. Keep the surrounding palette neutral so the silhouette stands out.
This approach creates a subtle spooky atmosphere without turning the room into a themed party set.
21. Create a Curated Halloween Console Table
Use your finished DIY projects together instead of scattering them randomly around the house. A console table provides enough room to build a complete Halloween moment.
Start with a tall branch arrangement at one side. Balance it with a smaller stack of books or frames at the opposite side. Add a few painted pumpkins and candleholders between them.
Keep the palette consistent and leave part of the tabletop uncovered. A little breathing room makes each piece easier to appreciate.
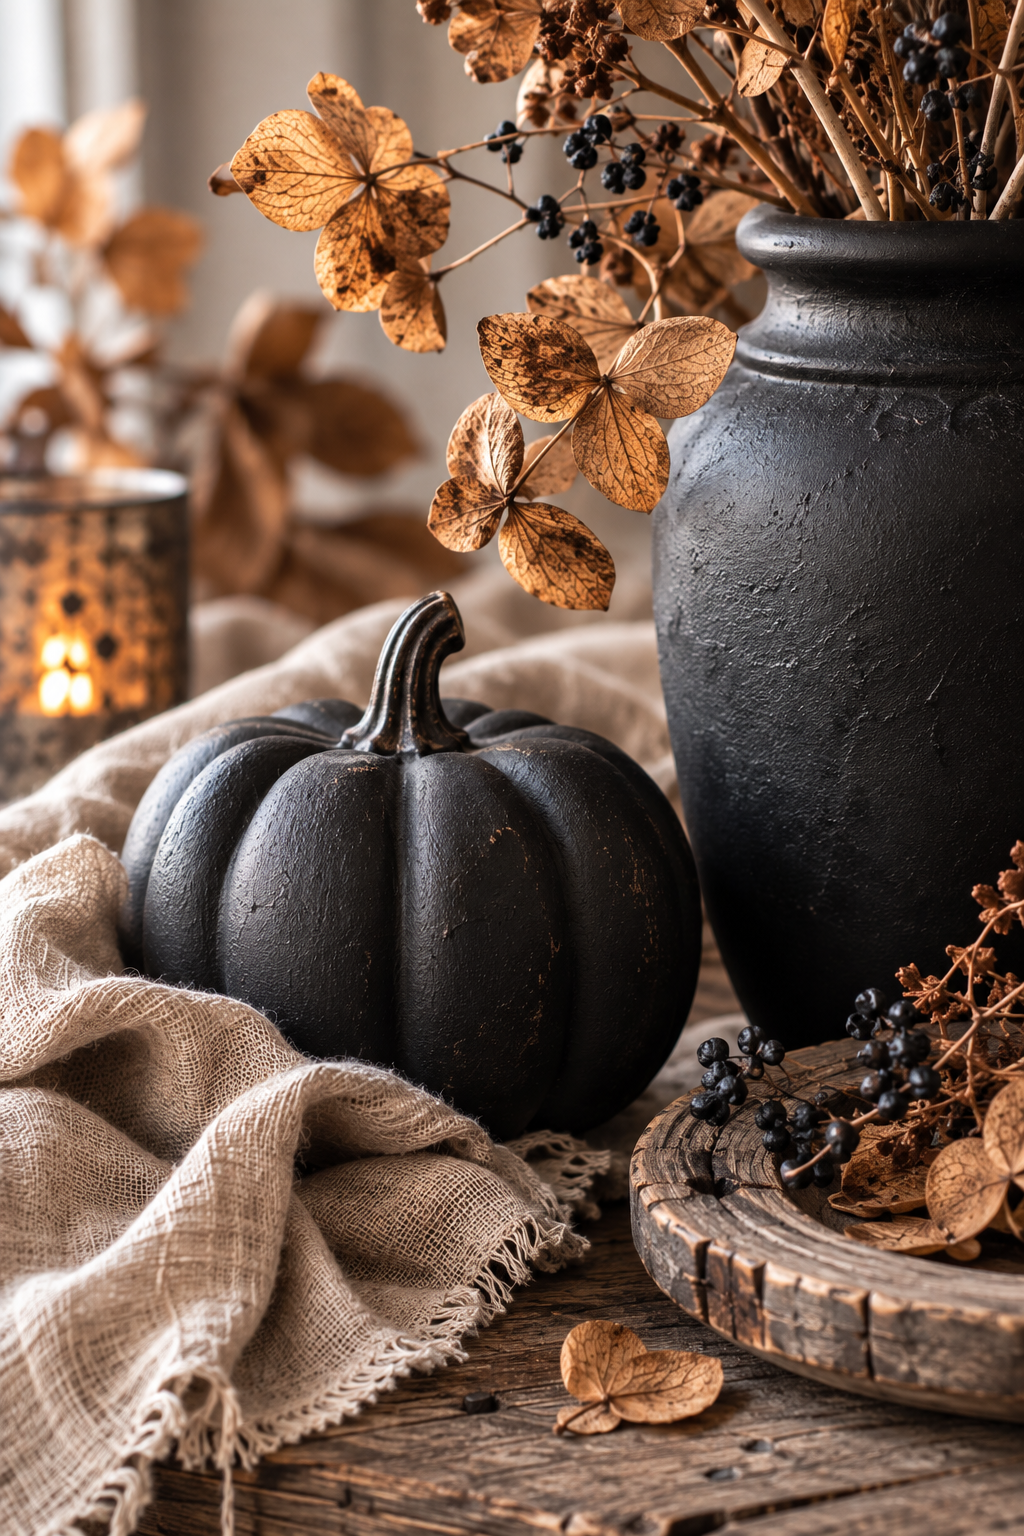
22. Build a Complete Dollar Store Halloween Vignette
For the final project, combine several inexpensive transformations into one coordinated vignette. You might use a matte black vase, dried branches, two painted pumpkins, an aged skull, a small framed botanical print, and a pair of candleholders.
Rather than thinking about each item separately, treat the entire arrangement as one composition. Repeat colors and textures while varying shape and height.
This is where inexpensive pieces can become much more convincing. The eye notices the overall palette and composition before it notices where each individual object came from.
How to Keep Dollar Store Halloween DIYs From Looking Cheap
The biggest difference between a cluttered craft display and a polished Halloween arrangement usually comes down to editing. Buying more is not necessarily the answer.
- Limit the palette. Choose two or three dominant colors and repeat them.
- Reduce shine. Matte and weathered finishes often photograph and style more naturally than glossy plastic.
- Add authentic texture. Dried foliage, wood, linen, paper, glass, and ceramic help balance inexpensive synthetic materials.
- Repeat finishes. Painting mismatched objects the same color can make them appear to belong together.
- Use fewer objects. One strong vignette is usually more effective than decorating every available surface.
- Vary height. Combine tall, medium, and low pieces to create a more intentional composition.
- Leave negative space. Empty areas make the objects you do display feel more important.
A Simple Beginner Dollar Store Halloween Makeover
If you are trying this decorating approach for the first time, begin with one small surface instead of an entire room. A shelf, entry table, sideboard, or coffee table is enough.
- Choose three to five inexpensive objects based on shape rather than color.
- Select one main finish, such as matte black, and one secondary neutral.
- Prepare and paint the objects according to the product instructions for the materials you are using.
- Allow every painted piece to cure or dry fully before styling.
- Add one natural texture such as dried branches, leaves, weathered wood, or linen.
- Arrange the tallest object first and build the smaller pieces around it.
- Remove at least one object before deciding the display is finished.
This last step matters. Budget Halloween decorating often becomes less convincing when too many inexpensive objects are displayed together. Editing the arrangement can instantly make it feel calmer and more intentional.
What Is Worth Buying at the Dollar Store for Halloween DIYs?
The best items are usually pieces with simple shapes that can be transformed easily. Do not worry too much about the original color if you already plan to change the finish.
Useful finds can include plastic pumpkins, simple skulls, glass bottles, small frames, trays, candleholders, basic vases, faux branches, small decorative houses, spiders, ravens, wreath forms, and plain fabric.
Before buying anything, imagine the item without its original finish. Ask whether you like the silhouette enough to keep it after the seasonal color, glitter, or glossy coating has been changed.
That question can prevent impulse purchases and keep your project budget under control.
How to Mix Dollar Store DIYs With Decor You Already Own
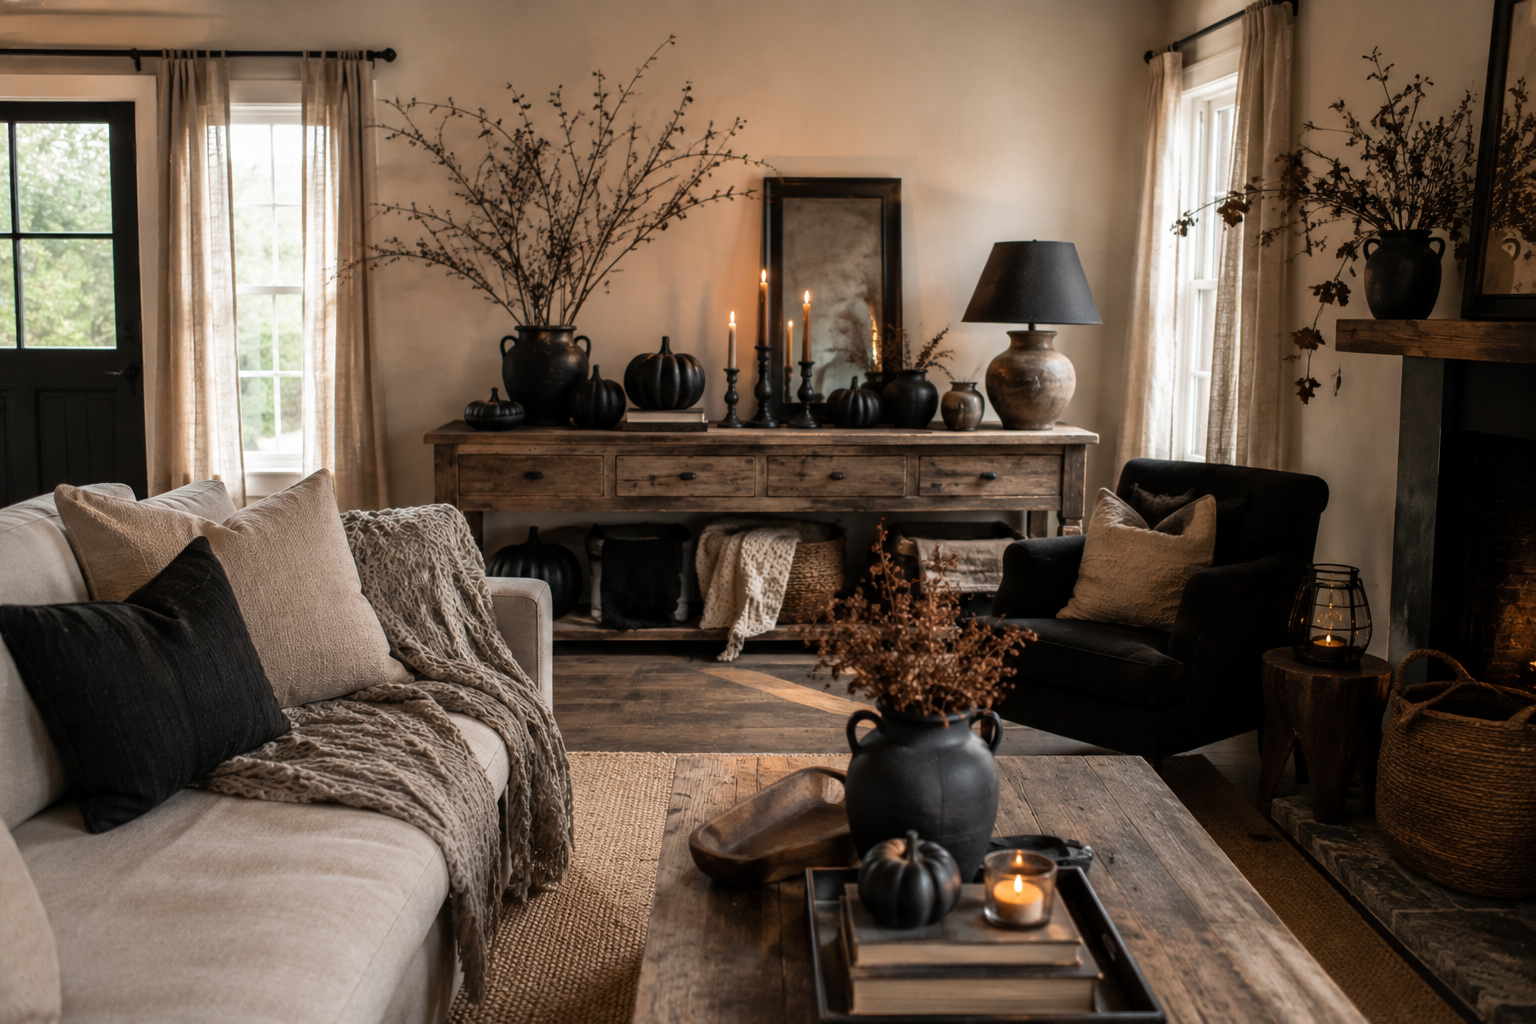
Your Halloween decorations will look more established when they are integrated with ordinary home accessories. Instead of removing everything from a shelf and replacing it with Halloween merchandise, keep some of your existing books, ceramic pieces, baskets, lamps, or artwork.
Then introduce a few seasonal objects around them.
A matte black pumpkin beside a ceramic vase feels like part of a home. Ten plastic pumpkins lined across the same shelf can feel more like seasonal merchandise.
This technique is especially useful when you want Halloween decor that feels cozy and grown-up while still being fun.
The Dollar Store Halloween Mistake to Avoid
The most common mistake is trying to make every individual object the star of the display.
When each piece has glitter, bright color, lettering, patterns, and novelty details, the eye has nowhere to rest. Even expensive decor can look cluttered under those conditions.
Instead, choose one focal point and allow the surrounding items to support it. Your focal point might be a dramatic black branch arrangement, an aged skull, or a group of candles. Everything else can remain quieter.
This is why the simplest dollar store halloween diy decor transformations are often the most successful. They are not trying to disguise inexpensive decor with more embellishment. They simplify it.
Create a Curated Halloween Look Without the Curated Price
A stylish Halloween home does not depend on where the decorations were purchased. Shape, finish, texture, scale, and placement have a much bigger influence on how the finished room feels.
Start with a few inexpensive pieces that have good silhouettes. Remove distracting finishes with a cohesive color treatment. Introduce real-world textures through dried foliage, wood, linen, paper, glass, or ceramic. Finally, style everything with enough space that each object can contribute to the overall composition.
You can use these 22 dollar store halloween diy decor ideas individually or combine several into one room. Either way, the goal is the same: spend less on the objects themselves and put more thought into how they are finished and displayed.
The result can feel moody, seasonal, and thoughtfully collected without requiring a large Halloween decorating budget.